How to Grout Tiles: Step-by-Step Guide for Perfect Results
Posted by Mike Belk on Oct 09, 2025

Tile grouting can make the difference between a drab DIY project and a showpiece finish. Most people do not realize that even a tiny bit of leftover debris in the joints can weaken your whole tile job. The real surprise is that what you do before picking up the grout float does more for longevity and looks than anything else in the process.
Table of Contents
- Step 1: Prepare The Grout Area And Gather Materials
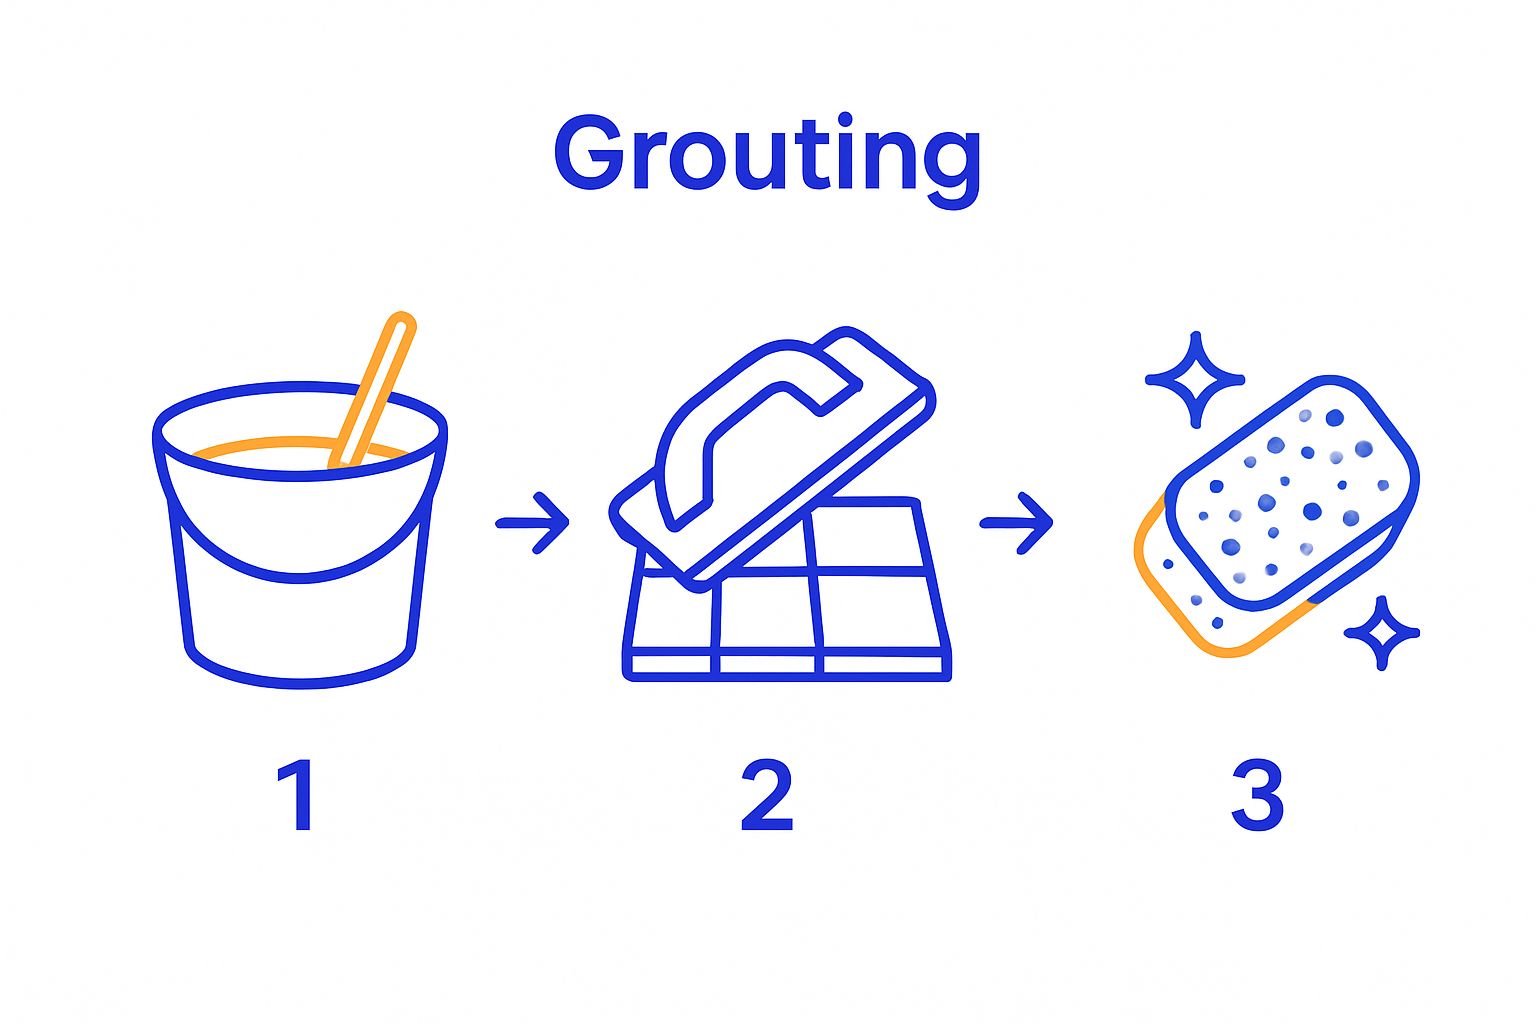
- Step 2: Mix The Grout According To Instructions
- Step 3: Apply The Grout To The Tiles Using A Float
- Step 4: Clean Excess Grout From The Tile Surface
- Step 5: Allow The Grout To Cure As Per Guidelines
- Step 6: Seal The Grout For Long-Lasting Durability
Quick Summary
| Key Point | Explanation |
|---|---|
| 1. Clean the tile surface thoroughly | Ensure all debris and old adhesive are removed to promote better grout adhesion and longevity. |
| 2. Mix grout for optimal consistency | Aim for a smooth, lump-free mixture resembling thick peanut butter to ensure effective filling of tile joints. |
| 3. Apply grout methodically with a float | Hold the float at a 45-degree angle to evenly distribute grout, avoiding gaps or air pockets. |
| 4. Clean excess grout promptly | Use a damp sponge 15-30 minutes after application to remove grout residue without damaging tile surfaces. |
| 5. Seal grout after curing | Apply a suitable sealer after 48-72 hours to protect grout from moisture and stains, enhancing durability. |
Step 1: Prepare the grout area and gather materials
Grouting tiles requires meticulous preparation and the right approach to ensure professional results. Before diving into the actual grouting process, you need to set up your workspace and collect all necessary materials. This initial stage is critical for achieving clean, durable tile joints that will enhance your surface’s appearance and longevity.
Start by thoroughly cleaning the tile surface and checking the joints between tiles. Remove any debris, dust, or leftover adhesive using a grout removal tool or utility knife. Completely clear the spaces between tiles, ensuring they are uniform and free from old grout remnants or construction materials. A clean surface guarantees better grout adhesion and a more polished final result.
Gather your essential tools and materials before beginning. You will need:
- Grout mix (sanded or unsanded, depending on tile spacing)
- Rubber float or grout spreader
- Bucket for mixing grout
- Clean water
- Sponges
- Protective gloves
- Mixing paddle or stick
- Knee pads (optional but recommended)
Select a grout color that complements your tile design. Neutral colors like gray or beige work well in most settings, while bold colors can create striking visual contrast. Check out our guide on tile design principles to help make the best aesthetic choice.
Prepare your work area by laying down drop cloths or plastic sheeting to protect surrounding surfaces from grout splatter. Wear comfortable clothing and ensure good ventilation in the workspace. Mix your grout according to manufacturer instructions, aiming for a smooth, consistent texture similar to thick peanut butter. Work in small sections to prevent the grout from drying out before you can properly apply and clean it.
Before proceeding, verify that your tile surface is completely clean, dry, and ready for grouting. Run your finger along the tile joints to confirm they are clear and uniform. This preparation stage sets the foundation for a professional grouting job that will look beautiful and last for years.
To help you prepare efficiently, here is a table summarizing essential tools and materials mentioned for grouting tiles, including their primary purpose and special considerations.
| Tool/Material | Purpose | Notes/Special Considerations |
|---|---|---|
| Grout mix | Fills joints between tiles | Choose sanded or unsanded based on tile spacing |
| Rubber float | Applies and spreads grout | Use at a 45-degree angle for best results |
| Mixing bucket | Holds grout mixture | Clean and free of previous residues |
| Clean water | Mixing and cleaning purposes | Change frequently to avoid contamination |
| Sponge | Cleans tile surfaces after grouting | Use damp, not soaking wet |
| Protective gloves | Protects hands during application | Disposable or reusable |
| Mixing paddle/stick | Blends grout to proper consistency | Use with drill for efficient mixing |
| Knee pads (optional) | Increases comfort while working | Highly recommended for large projects |
Step 2: Mix the grout according to instructions
Mixing grout correctly is a critical step that determines the overall quality and durability of your tile installation. The process requires precision and attention to detail to achieve a smooth, consistent mixture that will fill tile joints effectively and create a professional finish.
Selecting the right grout type is your first consideration. Ceramic and porcelain tiles typically work best with sanded grout for wider joints, while natural stone and glass tiles require unsanded grout to prevent scratching. Read the manufacturer’s specifications carefully to match the grout type with your specific tile material.
Begin by gathering a clean bucket, mixing paddle, and measuring tools. Pour the recommended amount of water into the bucket first, then gradually add the dry grout powder. Learn more about tile maintenance techniques to ensure long lasting results. Mix the grout using a drill with a mixing paddle or a manual mixing stick, combining ingredients at a slow and steady pace to prevent air bubbles.
Achieve the perfect consistency by mixing thoroughly for approximately 3 to 5 minutes. The ideal grout mixture should resemble thick peanut butter smooth and free of lumps. Avoid adding extra water after the initial mixing, as this can weaken the grout’s structural integrity. If the mixture seems too thick, remix carefully rather than introducing additional liquid.
Let the grout rest for 5 to 10 minutes after initial mixing. This process, called slaking, allows the chemical components to fully activate and creates a more uniform mixture. During this waiting period, do not stir or add water. When you return, give the grout a brief remix to restore its creamy texture.
Before proceeding, verify your grout mixture meets these key criteria:
- Smooth, lump free consistency
- No dry powder visible
- Thick enough to hold shape but spreadable
- Color uniform throughout mixture
Professional tilers recommend mixing only the amount of grout you can apply within 30 to 45 minutes. Grout begins to harden quickly, and working with fresh mixture ensures the best adhesion and appearance. Keep a damp sponge and clean water nearby to manage the application process and clean excess grout from tile surfaces.
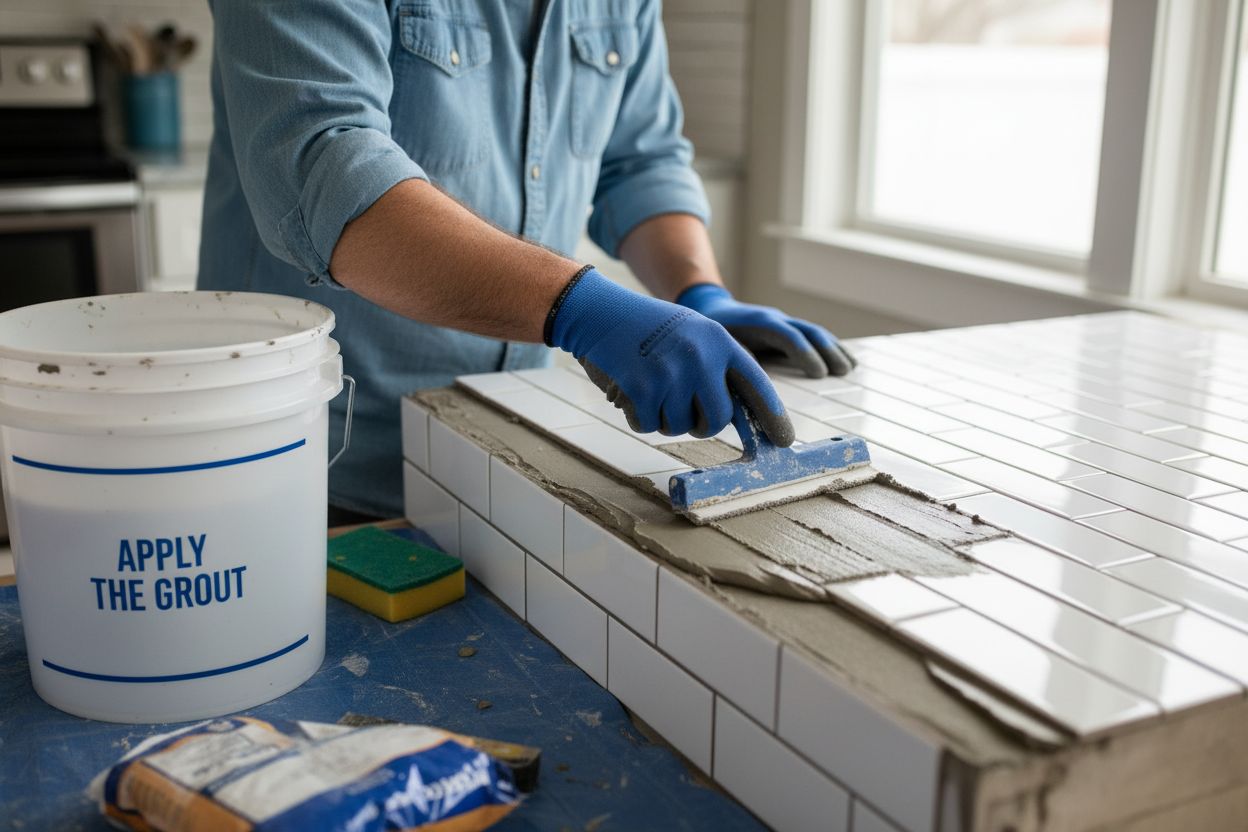
Step 3: Apply the grout to the tiles using a float
Applying grout with a rubber float is an art that requires technique, patience, and precision. This critical step transforms your tile surface from raw installation to a polished, professional finish. Hold the float at a 45-degree angle to ensure even distribution and complete coverage of tile joints.
Begin by working in small, manageable sections to prevent the grout from drying before you can properly clean and smooth it. Scoop a moderate amount of grout onto your float and press it firmly into the tile joints. Move the float diagonally across the tiles, which helps prevent pulling grout out of the joints. Check out our guide on tile design principles for additional insights into achieving a professional finish.
Apply consistent pressure while spreading the grout, ensuring each joint receives complete and uniform coverage. Work methodically across the surface, holding the float at a slight angle to force grout deeply into the spaces between tiles. Avoid leaving air pockets or gaps, which can compromise the grout’s integrity and appearance.
As you progress, periodically clean excess grout from the tile surface using the edge of your float. This technique helps prevent excessive buildup and makes subsequent cleaning easier. Be mindful of your technique your goal is to fill joints completely while minimizing grout on the tile surfaces themselves.
Watch for these key indicators of proper grout application:
- Joints appear evenly filled
- No visible gaps or air bubbles
- Grout sits slightly below tile surface
- Consistent color and texture across all joints
Professional tilers recommend working in sections no larger than 3 to 4 square feet at a time.
Here is a checklist table summarizing key verification steps before proceeding at critical stages, so you can ensure each phase is completed correctly for optimal results.
| Phase | Verification Steps |
|---|---|
| Surface Preparation | Tile joints are clear, clean, and uniformly spaced |
| Grout Mixing | No lumps, no dry powder, thick but spreadable texture |
| Grout Application | Joints filled evenly, no gaps or air bubbles |
| Initial Cleaning | Tiles wiped free of excess grout, lines are crisp |
| Curing | Grout color is uniform, no cracks or shrinking |
| Sealing | Even coverage, no streaks, grout lines slightly darker |
 This approach allows you to manage the grout before it begins to set, ensuring a clean and precise finish. Keep a bucket of clean water and a sponge nearby to quickly address any excess grout and maintain a tidy workspace.
Remember that timing is crucial. You want to remove excess grout before it fully hardens but after it has slightly set this usually occurs about 15 to 30 minutes after initial application, depending on room temperature and humidity. Patience and careful observation will help you achieve a professional looking result that enhances your tile installation.
Step 4: Clean excess grout from the tile surface
Cleaning excess grout from tile surfaces is a crucial step that transforms your grouting project from messy to magnificent. This process requires precision, patience, and a systematic approach to remove grout residue without damaging your newly installed tiles. Timing is everything when it comes to grout cleaning, as removing excess material too early or too late can compromise your final result.
Begin cleaning approximately 15 to 30 minutes after initial grout application, when the grout has started to set but remains slightly soft. Use a damp sponge with clean water, wringing it out thoroughly to avoid introducing excess moisture. Work in diagonal motions across the tile surface, rotating and rinsing your sponge frequently to prevent spreading grout residue.
The first pass should focus on removing the bulk of excess grout. Gently wipe the tiles using light, circular motions, being careful not to dig into the freshly applied grout lines. Learn more about tile maintenance techniques to protect your new installation. As you clean, rinse your sponge frequently in clean water to avoid redepositing grout on the tile surface.
After the initial cleaning, allow the tiles to dry for about 15 minutes. You will notice a hazy film developing this is normal and will be removed in subsequent cleaning steps. Use a clean, dry microfiber cloth or cheesecloth to buff the tiles gently, which helps remove the initial grout haze and begins to reveal the tile’s natural shine.
Watch for these key indicators of successful grout cleaning:
- Tiles appear clear and free of excess grout
- Grout lines look crisp and uniform
- No visible residue or film on tile surfaces
- Grout sits evenly between tile joints
For stubborn grout residue, wait 24 hours after initial grouting and use a soft, dry cloth or specialized grout haze remover. Avoid using acidic cleaners immediately after grouting, as these can damage both the grout and tile surfaces. Take your time with this step patience will reward you with a professional looking tile installation that showcases your hard work and attention to detail.
Step 5: Allow the grout to cure as per guidelines
Grout curing is a critical phase that determines the long-term durability and appearance of your tile installation. This step requires patience and careful environmental management to ensure optimal results. Proper curing creates a strong, resilient grout line that will protect your tiles and maintain their aesthetic appeal for years to come.
Immediately after grouting, create an environment that supports consistent curing. Maintain room temperature between 70 and 80 degrees Fahrenheit, avoiding extreme temperature fluctuations or direct sunlight that can cause rapid drying. Keep the area well-ventilated but not drafty, which helps prevent uneven moisture evaporation that could compromise grout strength.
Read our comprehensive guide on tile maintenance to understand how proper curing impacts long-term tile performance. Most standard cement-based grouts require approximately 72 hours for initial curing, during which time you should minimize foot traffic and avoid washing the surface.
Different grout types have unique curing requirements. Epoxy grouts cure faster but demand precise mixing, while cement-based grouts need more time and consistent moisture. Humidity plays a significant role in the curing process. In dry environments, consider lightly misting the grout lines with water or covering the area with a plastic sheet to prevent rapid moisture loss.
Watch for these key indicators of successful grout curing:
- Grout color becomes uniform and consistent
- No visible cracking or shrinkage
- Joints appear solid and smooth
- Surface feels firm and stable
Avoid sealing the grout immediately. Most manufacturers recommend waiting at least 48 to 72 hours before applying any sealant. This waiting period allows excess moisture to evaporate and ensures the grout has reached sufficient strength. During this time, protect the newly grouted surface from water, heavy impacts, and cleaning products.
Professional tilers suggest monitoring the curing process carefully. Check the grout lines periodically for any signs of uneven drying, small cracks, or color inconsistencies. If you notice any issues, consult the grout manufacturer’s specific guidelines or seek professional advice to address potential problems early in the curing process.
Step 6: Seal the grout for long-lasting durability
Grout sealing is the final and crucial step that protects your tile installation from moisture, stains, and potential damage. Sealing creates an invisible barrier that prevents dirt, liquids, and bacteria from penetrating the grout lines, extending the life and appearance of your tiled surface. This protective measure is essential for maintaining the beauty and integrity of your tile work.
Before beginning, ensure the grout has completely cured for at least 48 to 72 hours after initial installation. Clean the tile surface thoroughly, removing any residual dust or debris that might interfere with the sealing process. Discover more about tile sealer fundamentals to understand the importance of this protective layer.
Choose the appropriate sealer based on your specific tile and grout type. Penetrating sealers work best for porous materials like natural stone or cement-based grouts, while surface sealers are ideal for less absorbent materials. Silicone-based and water-based sealers offer different levels of protection, so select one that matches your specific tile installation environment.
Apply the sealer using a small foam brush, roller, or specialized applicator, working in small sections to ensure complete and even coverage. Move systematically across the surface, carefully applying the sealer directly to the grout lines. Avoid getting sealer on the tile surface itself, as this can create a hazy or streaky appearance. If some sealer accidentally contacts the tiles, wipe it away immediately with a clean cloth.
Verify the quality of your sealing by checking these key indicators:
- Even, consistent coverage across all grout lines
- No pooling or excess sealer on tile surfaces
- Grout lines appear slightly darker or more saturated
- No visible streaks or uneven patches
After application, allow the sealer to dry completely according to manufacturer instructions. Most sealers require approximately 24 to 48 hours of curing time before the surface can be exposed to water or heavy use. Maintain the sealed surface by cleaning with pH-neutral cleaners and avoiding harsh chemicals that might degrade the sealant.
Professional tilers recommend resealing grout every 1 to 2 years, depending on the level of foot traffic and exposure to moisture. Regular maintenance will protect your investment and keep your tile installation looking pristine for years to come.
Elevate Your Grouting Success with BELK Tile’s Expert Solutions
You have just learned how much effort and preparation it takes to achieve flawless results when grouting tile. Whether you are struggling with messy joints, uneven color, or choosing the right materials, the key to professional results always starts with high-quality products and dependable guidance. Many homeowners and designers find that inconsistent grout lines and time-consuming clean-up stem from using low-quality tiles or mismatched grout types. These issues not only delay your project but can also lead to wasted time and lost investment.
Ready to take the worry out of your tiling project? Discover BELK Tile’s curated collection of glass mosaic, ceramic, porcelain, and natural stone tiles that blend style with durability. Transform every space with stunning options for backsplashes, floors, and feature walls. Explore BELK Tile’s inspiration and product ideas or learn more about picking the ideal grout and sealer with our tile sealer fundamentals. Start your upgrade today with BELK Tile’s online showroom and get the perfect look and long-lasting performance your home deserves. Your next flawless grout line begins when you shop with the experts.
Frequently Asked Questions
What materials do I need to grout tiles?
You will need a grout mix (sanded or unsanded depending on tile spacing), a rubber float or grout spreader, a mixing bucket, clean water, sponges, protective gloves, a mixing paddle or stick, and optional knee pads.
How do I ensure the grout sets properly after application?
To ensure proper setting, maintain a room temperature between 70 and 80 degrees Fahrenheit, avoid direct sunlight, and keep the area well-ventilated. Most cement-based grouts require about 72 hours to cure before exposing them to moisture.
How do I clean excess grout from tile surfaces?
Clean excess grout 15 to 30 minutes after application using a damp sponge. Work in diagonal motions and rinse the sponge frequently to prevent spreading grout residue. After initial cleaning, buff the tiles with a dry cloth to remove haze.
How often should I seal my grout after installation?
It is recommended to seal grout every 1 to 2 years, depending on foot traffic and exposure to moisture, to maintain durability and protect against stains.
Recommended


