Bathroom Tile Installation Guide for Flawless Results
Posted by Mike Belk on Nov 19, 2025

A flawless bathroom tile job begins long before the first tile is set. More than 60 percent of home renovation mishaps happen during tile installation because key steps get skipped or rushed. Careful planning, the right tools, and proper surface preparation can make the process much easier and the results long-lasting. This guide breaks down every detail you need to know, from gathering materials to mastering finishing touches, so you can achieve a pro-quality bathroom that stands the test of time.
Table of Contents
- Step 1: Gather Essential Tools and Tile Materials
- Step 2: Prepare the Bathroom Surface for Tiling
- Step 3: Plan and Layout Your Tile Design
- Step 4: Install Tiles with Correct Adhesive Application
- Step 5: Grout and Seal Tiles for Lasting Protection
- Step 6: Inspect and Clean for a Finished Look
Quick Summary
| Key Point | Explanation |
|---|---|
| 1. Gather essential tools and materials | Collect tools like tile cutters and adhesives before starting. This ensures a smooth and efficient installation process. |
| 2. Prepare the surface thoroughly | Clean and inspect the surface for damage to guarantee optimal tile adhesion. A stable foundation prevents future issues. |
| 3. Plan your tile layout carefully | Create a detailed layout and dry-fit tiles beforehand. This minimizes waste and ensures a professional visual appeal. |
| 4. Apply adhesive properly | Use the correct adhesive with a notched trowel in small sections to secure tiles effectively without compromising alignment. |
| 5. Grout and seal after installation | Choose suitable grout and allow it to cure well before sealing. This protects your tiles from moisture and extends their lifespan. |
Step 1: Gather Essential Tools and Tile Materials
Successful bathroom tile installation starts with gathering the right equipment and materials. According to tiletraining.org, a comprehensive set of tools will make your project smooth and professional.
Your toolkit should include personal protective gear like knee pads and work gloves, along with precision tools such as a tile cutter, tile nippers, notched trowels in multiple sizes, a reliable level, measuring tape, and a rubber mallet. For mixing and applying materials, you will need a bucket, sponges, and mixing tools. As csdcindia.org recommends, select quality materials including tile adhesive, waterproofing membrane, grout, and appropriate backer board for your specific bathroom environment.
Pro tip for beginners: Always purchase about 10% more tile than your measured space requires. This accounts for cuts, breakage, and future replacements while ensuring you have a consistent batch and color match. When you have all your tools and materials ready, you are set to transform your bathroom with professional quality tile work.
Ready to start preparing your workspace? The next step involves carefully measuring and planning your tile layout.
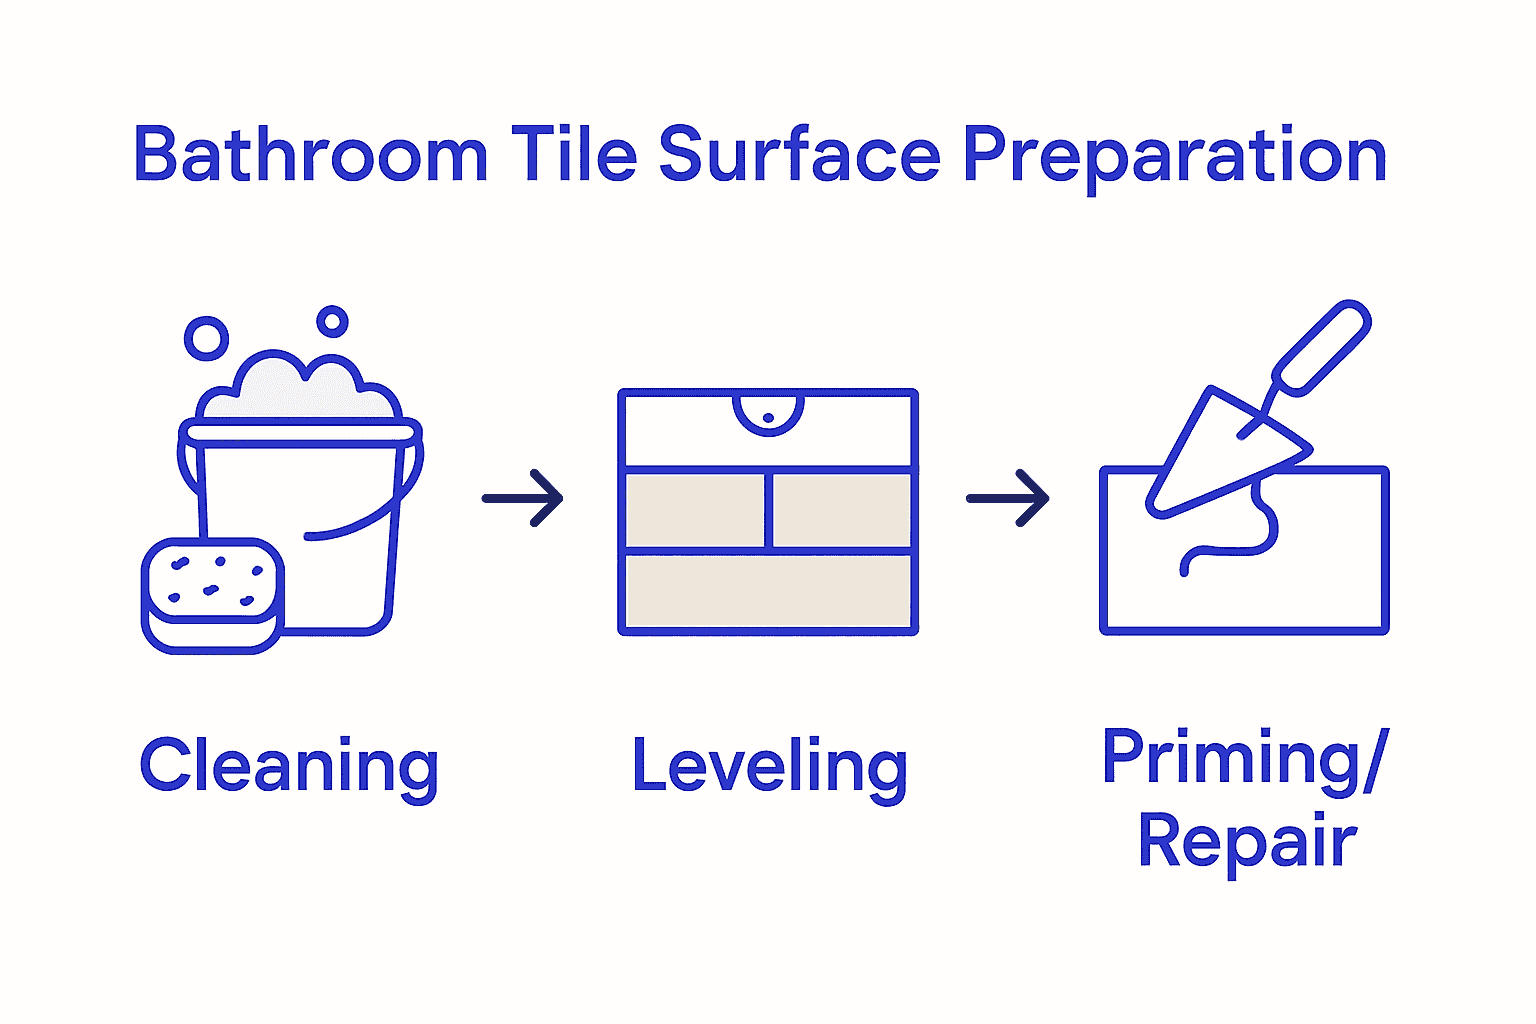
Step 2: Prepare the Bathroom Surface for Tiling
Before you start laying tiles, preparing your bathroom surface is critical for a successful installation. According to ceramictilefoundation.org, proper substrate preparation prevents future tile failures by ensuring a clean and level foundation.
Begin by thoroughly cleaning the existing surface, removing any dirt, grease, or old adhesive. Inspect the area for cracks, uneven spots, or water damage. skillsforemployment.org emphasizes the importance of leveling and priming the substrate to guarantee optimal tile adhesion. For concrete or cement surfaces, use a self leveling compound to create a smooth base. If you are working with drywall or cement board, repair any imperfections and ensure the surface is completely dry and stable.
Pro tip: Test the surface levelness by placing a long straight edge or level across the area. Any gaps larger than 1/8 inch will need to be addressed before tile installation. This meticulous preparation sets the stage for a professional looking bathroom tile project that will look great and last for years.
With your surface prepared, you are now ready to move on to the next crucial step of planning your tile layout.
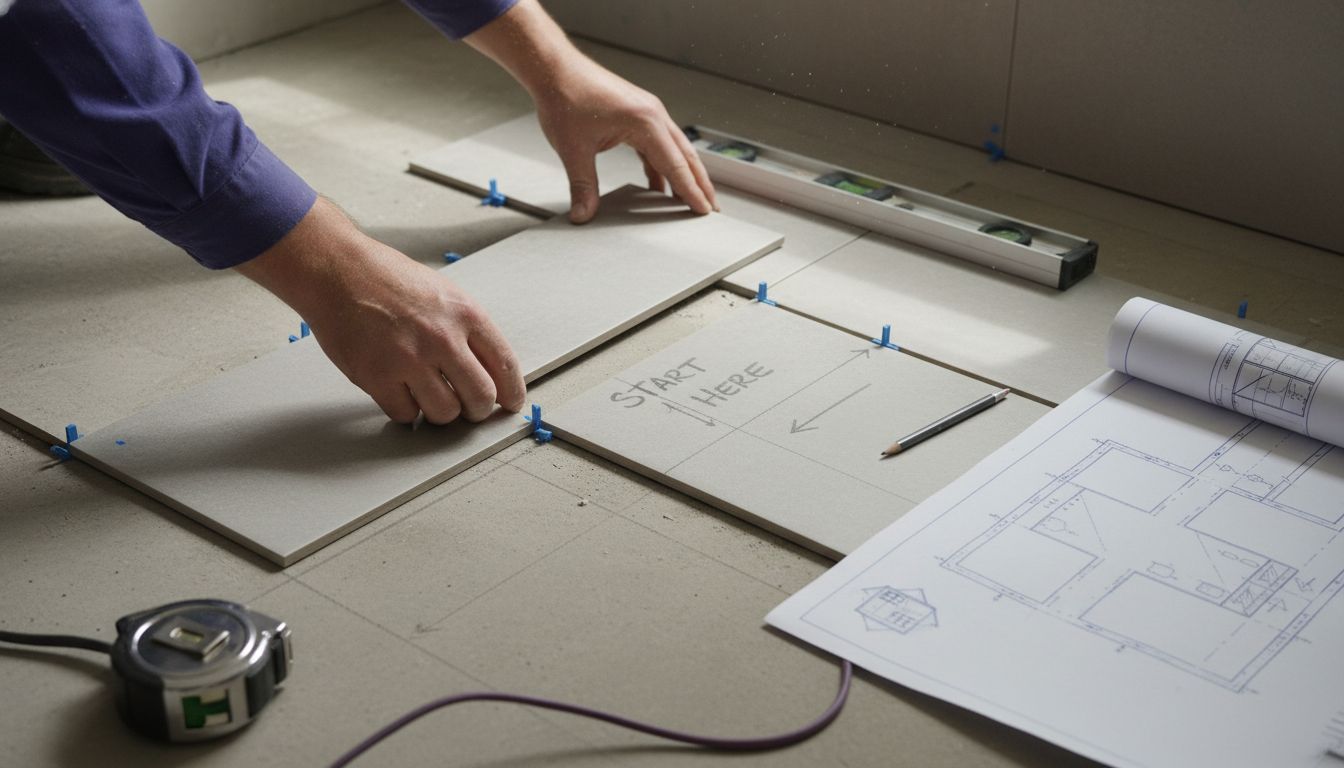
Step 3: Plan and Layout Your Tile Design
Tile layout is more than just placing tiles randomly. According to roomcrafts.org, careful planning and measurement are essential for a successful tiling project that looks professional and polished.
Start by creating a detailed scale drawing of your bathroom, marking precise measurements for walls, floors, and any obstacles like fixtures or windows. ceramictilefoundation.org recommends organizing your tools and materials before beginning the layout process. Perform a dry layout by placing tiles without adhesive to visualize the final design and identify potential cutting requirements. Consider your tile pattern carefully some popular options include straight lay, herringbone, diagonal, and basketweave. Aim to minimize tile cuts and create symmetrical layouts that minimize waste.
Pro tip: Always start your layout from the most visible area of the room, typically the center of the wall or floor. This ensures the most visually appealing placement and helps you strategically plan tile cuts around edges and fixtures. Dry fitting allows you to make adjustments before committing to permanent installation, potentially saving time and reducing material waste.
With your tile layout carefully planned, you are now ready to move forward with the actual installation process.
Step 4: Install Tiles with Correct Adhesive Application
Tile adhesive application is a critical step that determines the longevity and quality of your bathroom tile installation. According to roomcrafts.org, applying adhesive evenly with a notched trowel and working in small sections prevents premature drying and ensures a strong bond between tiles and the substrate.
skillsforemployment.org emphasizes the importance of selecting the right adhesive for your specific tile and surface type. Begin by choosing a waterproof adhesive designed for bathroom environments. Use a notched trowel held at a 45 degree angle to spread the adhesive uniformly creating consistent ridges. Work in small manageable sections about 3 to 4 square feet at a time to prevent the adhesive from drying before tile placement. Apply adhesive smoothly without leaving gaps or excess material that could compromise tile alignment.
Pro tip: Always check the adhesive manufacturers recommended open time the window during which tiles can be placed after spreading the adhesive. If the adhesive begins to form a skin or becomes tacky before you place tiles remove and reapply to ensure optimal adhesion. This meticulous approach guarantees a professional looking installation that will withstand moisture and daily wear.
With tiles carefully set in place using proper adhesive techniques you are now prepared for the next critical step of grouting.
Step 5: Grout and Seal Tiles for Lasting Protection
Grouting and sealing are the final critical steps that transform your tile installation from good to exceptional. According to roomcrafts.org, these processes protect against moisture and significantly enhance the longevity of your tiled surface.
skillsforemployment.org emphasizes the importance of selecting the right grout for your specific tile and bathroom environment. Start by choosing a grout that matches your tile color and is specifically designed for wet areas. Use a rubber float held at a 45 degree angle to press grout firmly into tile joints, working diagonally across the tiles to ensure complete coverage. After initial application wait 15 to 20 minutes then clean excess grout with a damp sponge, being careful not to remove grout from between tiles.
Pro tip: Allow grout to cure completely for 48 to 72 hours before applying a penetrating sealer. When sealing focus on creating an even coat that fills grout lines without pooling on tile surfaces. This meticulous approach prevents water penetration and protects your beautiful new bathroom tile installation from potential moisture damage.
With grouting and sealing complete your bathroom tile project is now ready to withstand years of daily use.
Step 6: Inspect and Clean for a Finished Look
The final stage of your tile installation is all about achieving a professional and polished appearance. According to roomcrafts.org, carefully inspecting the tiles for alignment and thoroughly cleaning off excess grout ensures a flawless finished result.
Begin your detailed inspection by examining each tile section carefully. Check for consistent spacing, even alignment, and any residual grout or adhesive that might need removal. Use a soft cloth and recommended tile cleaner to gently wipe down the surface, removing any haze or film left from the installation process. ceramictilefoundation.org recommends paying special attention to cleaning your tools immediately after use to maintain their condition and prepare for future projects.
Pro tip: Take your time during the final cleaning process. Use a magnifying glass or bright light to spot any minor imperfections, and address them before they become more noticeable over time. A microfiber cloth and specialized tile cleaner can help you achieve a streak free shine that highlights the beauty of your new bathroom tiles.
Congratulations. Your bathroom tile installation is now complete and ready to be enjoyed.
Elevate Your Bathroom Tile Project with BELK Tile
Taking on a bathroom tile installation can be overwhelming with all the steps involved from material selection to precise adhesive application and final grouting. The challenge lies in finding high-quality tiles that perfectly match your design vision while ensuring durability and seamless installation as outlined in the “Bathroom Tile Installation Guide for Flawless Results.” Whether you are concerned about achieving the right tile layout, selecting the appropriate grout, or simply want to avoid common pitfalls like uneven adhesion and moisture damage BELK Tile offers an extensive collection to help you overcome these hurdles.
Explore our diverse range featuring ceramic, porcelain, natural stone, and specialty tiles designed for bathroom environments that require both style and lasting performance. With detailed product descriptions and easy navigation at BELK Tile you can find exactly what suits your project needs and aesthetic preferences. Ready to simplify your project today and bring your bathroom vision to life? Visit BELK Tile to browse collections and make your purchase with confidence knowing you have expert-quality products to support every step of your tile installation journey.
Frequently Asked Questions
How do I prepare the bathroom surface for tile installation?
To prepare the bathroom surface, thoroughly clean it and check for any cracks or uneven spots. Use a self-leveling compound to create a smooth base if necessary, ensuring the surface is dry and stable before proceeding.
What are the key tools needed for bathroom tile installation?
Essential tools include a tile cutter, notched trowels, a level, measuring tape, and personal protective gear like knee pads and gloves. Gather all these items to ensure you’re fully equipped for a smooth installation process.
How should I plan my tile layout before installation?
Create a detailed scale drawing of your bathroom, marking measurements for walls and fixtures. Perform a dry layout by placing tiles without adhesive to visualize the design and minimize cutting before final installation.
What is the best way to apply tile adhesive?
Apply tile adhesive evenly using a notched trowel held at a 45-degree angle to create consistent ridges. Work in small sections to prevent the adhesive from drying out before you place the tiles.
How can I ensure my grout is applied correctly?
Use a rubber float to press grout firmly into the tile joints and clean off excess grout with a damp sponge shortly after application. Allow the grout to cure for 48 to 72 hours before sealing to ensure stability.
What steps should I take for the final inspection of my tile installation?
Carefully inspect each tile section for consistent spacing and alignment before cleaning. Use a soft cloth and suitable tile cleaner to remove any haze, ensuring your finished tiles look polished and professional.
Recommended


