Step by Step Tile Installation: A Complete DIY Guide
Posted by Mike Belk on Sep 08, 2025

Tile installation might look easy when you scroll past those eye-catching before-and-after photos. Most people do not realize how much prep work makes or breaks the final result. Skipping just one step can ruin the whole project and studies show that over 50 percent of DIY tile failures come from poor surface preparation. So if you want that flawless, magazine-worthy finish, it all starts long before you ever lay down a single tile.
Table of Contents
- Step 1: Prepare Your Workspace And Gather Materials
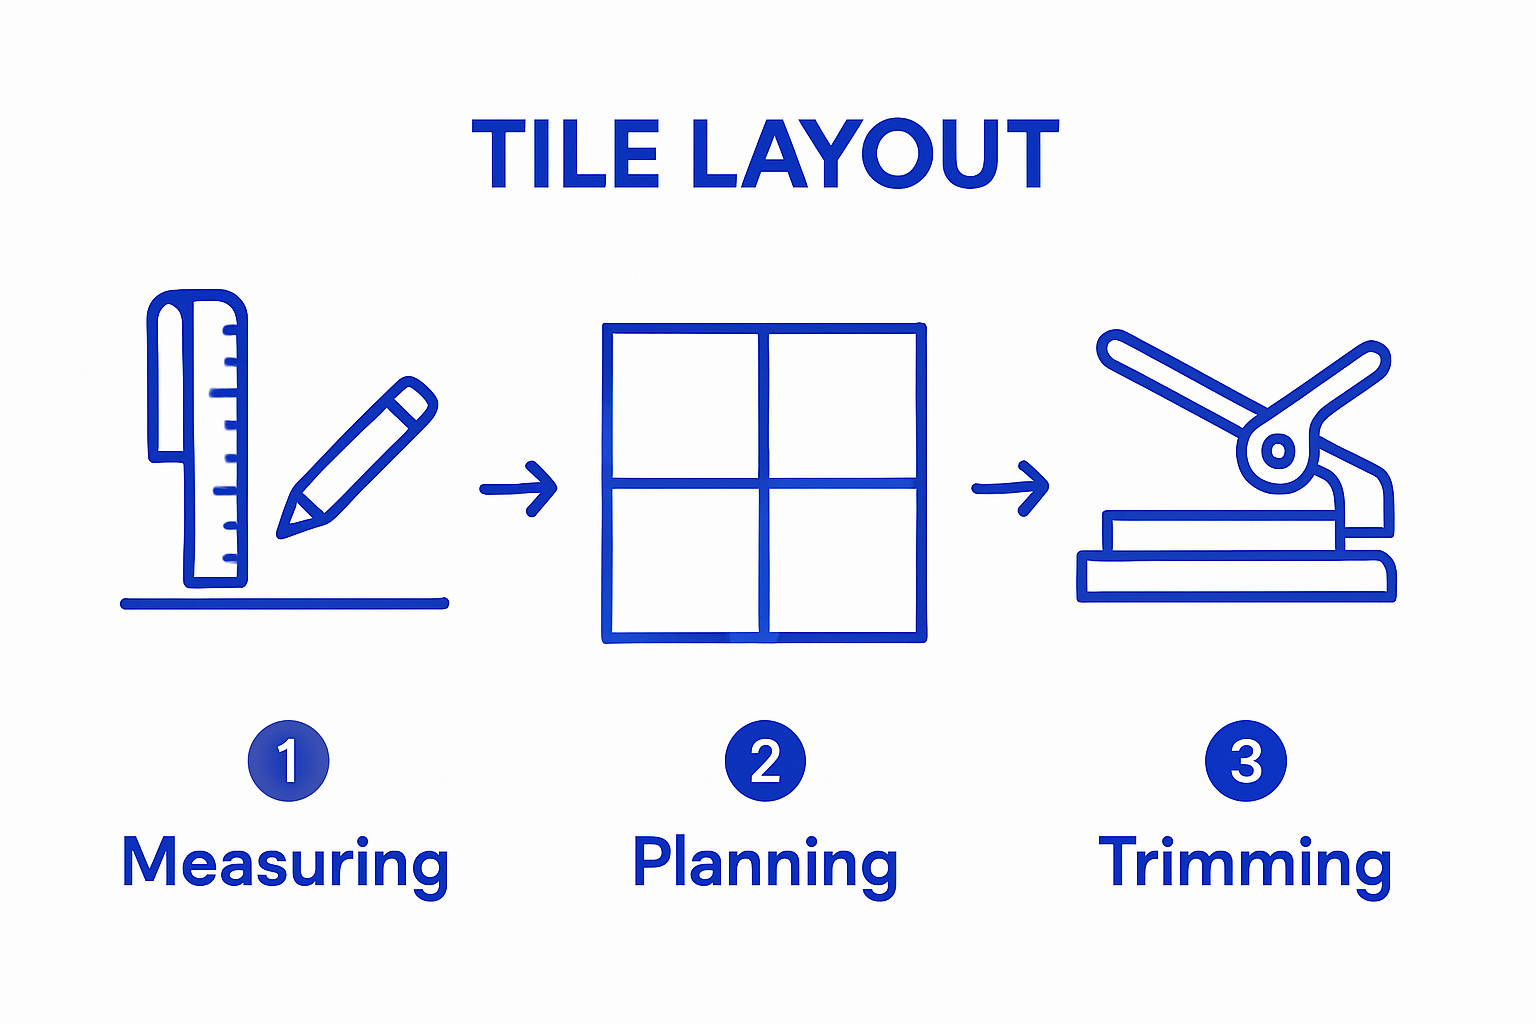
- Step 2: Measure And Plan The Tile Layout
- Step 3: Apply Adhesive And Set The Tiles
- Step 4: Cut Tiles For Edges And Corners
- Step 5: Grout The Tiles And Clean Excess
- Step 6: Inspect And Finalize The Installation
Quick Summary
| Key Point | Explanation |
|---|---|
| 1. Properly Prepare Your Workspace | Clear the area and gather all necessary materials before starting to ensure a smooth tiling process. |
| 2. Measure Accurately and Plan Layout | Take precise measurements and create a detailed layout to avoid costly mistakes and ensure visual appeal. |
| 3. Apply Adhesive Gently and Accurately | Spread adhesive in manageable sections, checking tile alignment frequently to prevent misalignment. |
| 4. Cut Tiles with Precision | Use the appropriate tools for cutting and practice on spare tiles to achieve neat, professional edges. |
| 5. Conduct a Thorough Final Inspection | Review the completed installation for consistency, alignment, and imperfections to ensure quality results. |
Step 1: Prepare Your Workspace and Gather Materials
Starting a tile installation project requires careful preparation and strategic planning. Before diving into the actual tiling process, setting up a well-organized workspace and collecting the right materials can make the difference between a professional-looking result and a frustrating DIY experience. Proper preparation is the foundation of successful tile installation.
Begin by clearing the entire work area completely. Remove all furniture, rugs, baseboards, and any existing flooring that might interfere with your new tile installation. Create a clean, open space that allows you to move freely and work efficiently.
Below is a table summarizing the essential tools and materials required for a DIY tile installation project, along with their specific purposes.
| Tool/Material | Purpose |
|---|---|
| Tile cutter/wet saw | Cutting tiles to required size and shape |
| Measuring tape | Taking precise measurements of the workspace |
| Level | Ensuring the surface and tiles are even |
| Notched trowel | Spreading tile adhesive evenly |
| Tile spacers | Maintaining uniform grout lines |
| Grout float | Spreading and pressing grout into joints |
| Mixing bucket | Mixing adhesive or grout |
| Safety glasses | Protecting eyes while cutting tiles |
| Knee pads | Providing comfort and support during installation |
| Tile adhesive | Attaching tiles securely to the surface |
| Grout | Filling spaces between tiles |
| Grout sealer | Protecting grout from moisture and stains |
Next, gather your essential tools and materials. For a comprehensive tile installation, you will need:
- Tile cutter or wet saw
- Measuring tape
- Level
- Trowel (notched, appropriate for your tile size)
- Tile spacers
- Grout float
- Mixing bucket
- Safety glasses
- Knee pads
- Tile adhesive
- Grout
- Grout sealer
Carefully inspect your chosen surface for any structural issues. Check for levelness using a long straightedge or laser level. Uneven surfaces will require careful preparation, which might involve applying a layer of cement board, self-leveling compound, or making structural repairs. Even minor imperfections can significantly impact your final tile installation.
Understanding moisture conditions is crucial. Use a moisture meter to test the subfloor or wall surface. Excessive moisture can lead to tile failure, causing adhesive breakdown and potential mold growth. If moisture levels are high, address the underlying issue before proceeding. Read more about advanced surface preparation techniques to ensure a stable foundation for your tiles.
Calculate the total square footage of your project and purchase approximately 10% extra tiles to account for cuts, breakage, and future replacements. This buffer prevents potential delays and ensures a seamless installation process. By methodically preparing your workspace and gathering all necessary materials, you set the stage for a successful and professional tile installation project.
This table provides a step-by-step overview of the main stages in the DIY tile installation process, with each step’s primary objective to help you quickly reference the workflow.
| Step | Main Objective |
|---|---|
| Prepare Workspace & Gather Materials | Ensure area is clean and have all equipment ready |
| Measure & Plan Layout | Prevent waste and optimize design |
| Apply Adhesive & Set Tiles | Achieve secure and aligned tile placement |
| Cut Tiles for Edges | Ensure accurate fitting at boundaries |
| Grout Tiles & Clean Excess | Fill gaps and create a seamless finished surface |
| Inspect & Finalize | Confirm quality, integrity, and visual consistency |
Step 2: Measure and Plan the Tile Layout
Measuring and planning your tile layout is a critical step that determines the overall aesthetic and professional appearance of your installation. Precise measurements and strategic planning prevent costly mistakes and ensure a visually appealing result that looks intentional and polished.
Start by taking comprehensive measurements of your space. Use a high-quality metal measuring tape to capture the length and width of the area, measuring multiple times to confirm accuracy. Record these measurements on graph paper or a digital layout sketch, which allows you to visualize the tile placement and identify potential challenges. Pay special attention to architectural features like corners, windows, doorways, and built-in fixtures that might require custom tile cuts.
Calculate the total square footage by multiplying the length by the width. Always add an extra 10% to your material calculations to account for cuts, breakage, and future repairs. Pro tip: purchase tiles from the same production batch to ensure consistent color and texture. When selecting tile sizes, consider the room’s dimensions. Larger tiles can make small spaces feel more expansive, while smaller tiles work well in compact areas or for creating intricate design patterns.
Create a detailed layout plan before you start installing. Dry lay your tiles without adhesive to preview the final look and identify potential cutting requirements. Use tile spacers to maintain consistent grout lines and ensure a professional finish. Check out our comprehensive guide on tile selection for kitchen spaces to help refine your design approach.
Key considerations for your tile layout include:
- Symmetry and visual balance
- Minimizing small tile cuts at room edges
- Centering tile patterns in prominent areas
- Avoiding thin, awkward tile slivers
Take photographs of your dry layout and review them critically. Look for any potential issues with tile alignment, pattern continuity, or awkward cuts. Making adjustments during the planning phase is far easier and less expensive than correcting mistakes after installation. By investing time in careful measurement and strategic planning, you set the foundation for a stunning tile installation that will enhance your space for years to come.
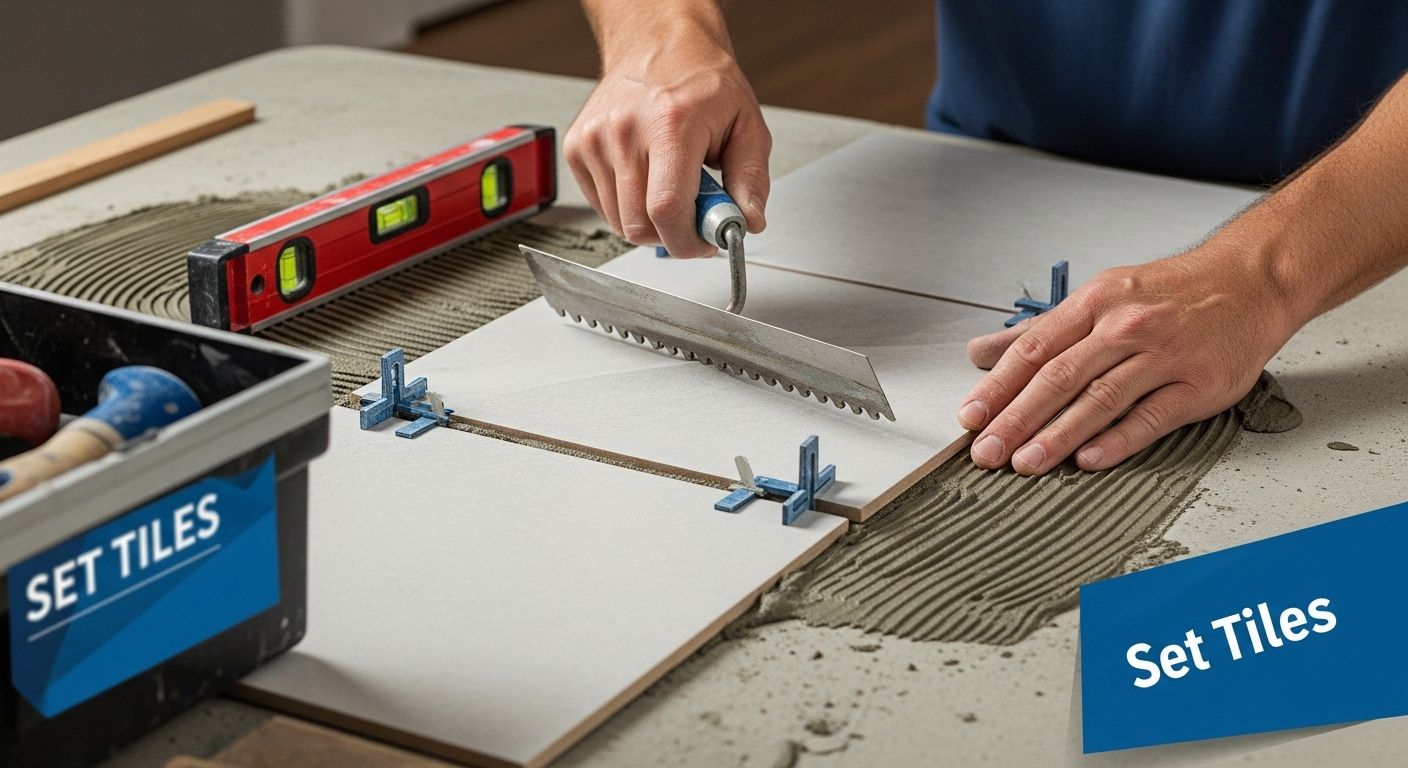
Step 3: Apply Adhesive and Set the Tiles
Applying adhesive and setting tiles is a precision-driven process that requires patience, technique, and careful attention to detail. The success of your entire tile installation hinges on this critical step, transforming your carefully planned layout into a permanent, beautiful surface.
Begin by selecting the appropriate tile adhesive for your specific project. Different surfaces and tile types require specific adhesive formulations. For ceramic or porcelain tiles, a standard thinset mortar works well, while natural stone might need a specialized adhesive that provides additional flexibility and support. Mix the adhesive according to manufacturer instructions, achieving a smooth, consistent texture similar to thick peanut butter.
Using a notched trowel held at a 45-degree angle, spread the adhesive in smooth, even strokes. Work in small sections to prevent the adhesive from drying before tile placement. Apply enough adhesive to cover approximately 3-4 square feet at a time, which allows you to maintain control and ensure proper tile positioning. Press each tile firmly into the adhesive, using a slight twisting motion to ensure complete coverage and eliminate air pockets.
Maintain consistent spacing between tiles using spacers. These small plastic tools ensure uniform grout lines and professional-looking results. As you place each tile, periodically check your work with a level to confirm straight alignment. Immediate adjustments are easier than correcting tiles after the adhesive has set. Learn advanced techniques for achieving professional tile installation results to elevate your project.
Key techniques for successful tile setting include:
- Use gentle, even pressure when placing tiles
- Clean excess adhesive immediately with a damp sponge
- Check tile alignment frequently
- Remove and reposition tiles quickly if misaligned
As you complete each section, step back and visually inspect your work. Look for even spacing, straight lines, and consistent adhesive coverage. Remove any spacers that might interfere with subsequent grouting. Allow the adhesive to cure completely according to manufacturer recommendations, typically 24-48 hours, before proceeding to the grouting stage.
 By methodically applying adhesive and setting tiles with precision, you’re creating a durable, aesthetically pleasing surface that will enhance your space for years to come.
Step 4: Cut Tiles for Edges and Corners
Cutting tiles for edges and corners requires precision, patience, and the right tools. This step transforms your tile installation from a basic layout to a professional-looking finish, ensuring every section of your surface looks intentional and seamless. Mastering tile cutting techniques is crucial for achieving a polished, high-end result.
Choose your cutting tool based on the tile material and complexity of your cuts. A manual tile cutter works well for straight ceramic and porcelain cuts, while a wet saw becomes essential for more intricate shapes, natural stone tiles, or harder materials. Before making any cuts, put on safety glasses and work gloves to protect yourself from sharp edges and tile fragments. Measure twice and mark your cutting lines clearly using a pencil and straightedge, ensuring accuracy before you make any permanent cuts.
Straight cuts require steady hand movement and consistent pressure. When using a manual tile cutter, score the tile surface firmly in one smooth motion, then apply downward pressure to snap the tile cleanly. For wet saws, move the tile slowly and steadily through the blade, allowing the water to cool the blade and reduce dust. Complex cuts around outlets, pipes, or irregular shapes might require a combination of tools like tile nippers and manual scoring techniques.
Learn more about professional tile edging techniques to elevate your installation quality. Practice cutting on spare tiles to build confidence and develop a feel for the tools before working on your primary installation surface.
Critical considerations for successful tile cutting include:
- Always cut with the decorative side facing up
- Use a pencil for marking to avoid permanent marks
- Make small, incremental cuts for complex shapes
- Test fit cut tiles before permanent installation
After completing your cuts, smooth rough edges using a rubbing stone or sandpaper. This prevents sharp edges and ensures a more professional appearance. Clean cut tiles immediately to remove any dust or debris that could interfere with adhesive bonding. By approaching tile cutting methodically and patiently, you’ll create precise edges that make your entire installation look meticulously crafted and visually stunning.
Step 5: Grout the Tiles and Clean Excess
Grouting represents the final transformative stage of your tile installation, where individual tiles become a unified, polished surface. This critical step not only fills the spaces between tiles but also provides structural integrity and a finished aesthetic to your entire project. Proper grouting technique can elevate your installation from good to exceptional.
Begin by selecting the right grout for your specific tile type and project location. Sanded grout works best for wider tile joints, while unsanded grout is ideal for narrow spacing. Mix the grout according to manufacturer instructions, achieving a consistency similar to thick peanut butter. Work in small sections to prevent the grout from drying before you can clean and shape the joints.
Using a rubber grout float held at a 45-degree angle, spread the grout diagonally across the tile surface. Press firmly to ensure complete joint filling, working the grout into every space between tiles. Move the float systematically, removing excess grout and creating smooth, even lines. Pay special attention to corners and edges, where precise grouting makes a significant visual difference.
Discover professional tips for maintaining your newly grouted tiles to preserve your hard work. After initial application, wait approximately 15-20 minutes for the grout to slightly set before beginning cleanup.
Key grouting techniques to remember:
- Use a damp sponge for initial cleanup
- Rinse sponge frequently in clean water
- Avoid oversaturating the grout lines
- Make multiple gentle passes to clean tiles
After the initial cleanup, allow the grout to cure for 24-48 hours. Once fully dry, apply a grout sealer to protect against moisture and staining. This final step creates a water-resistant barrier that extends the life of your tile installation. By methodically applying and cleaning grout, you transform a collection of individual tiles into a seamless, professional-looking surface that will enhance your space for years to come.
Step 6: Inspect and Finalize the Installation
The final inspection and completion of your tile installation represents the crucial moment where craftsmanship meets precision. This comprehensive review transforms your hard work into a professional-quality surface that will enhance your space for years to come. A meticulous final inspection ensures every detail meets the highest standards of quality and aesthetic appeal.
Begin your inspection by stepping back and examining the entire tiled surface from multiple angles and lighting conditions. Natural daylight and artificial lighting will reveal subtle imperfections that might have been overlooked during installation. Check for consistent grout lines, tile alignment, and any uneven surfaces. Run your hands gently across the tiles, feeling for lippage where tiles are not perfectly level with their neighboring tiles. Small variations can dramatically impact the overall visual and tactile quality of your installation.
Carefully inspect each tile for potential issues such as chips, cracks, or adhesive residue. Clean any remaining grout haze using a specialized tile cleaner recommended for your specific tile type. Pay extra attention to corners, edges, and areas around fixtures where precision is most challenging. Use a bright light source to highlight any remaining imperfections that might require touch-up work.
Learn more about maintaining your newly installed tiles for long-lasting beauty to protect your investment. Allow the installation to cure completely according to adhesive and grout manufacturer recommendations before subjecting the surface to heavy use.
Key final inspection criteria include:
- Verify all tiles are firmly bonded
- Check for uniform grout line width
- Ensure no visible adhesive remains
- Confirm tiles are level and aligned
- Test grout sealer effectiveness
Document your installation with photographs from multiple angles. These can serve as a reference for future maintenance or potential warranty claims. By approaching the final inspection with patience and attention to detail, you transform a series of individual steps into a seamless, professional-quality tile installation that reflects your skill and dedication to craftsmanship.
Finish Your DIY Tile Project With Confidence—Discover BELK Tile’s Solutions
You have followed every step carefully. You cleared your space, gathered materials, measured precisely, applied adhesive, cut edges, and finished with a perfect grout job. Yet, even the most detailed DIY tile installation can be stressful when you worry about choosing tiles that truly bring your vision to life. Many DIYers struggle to find high-quality materials that fit their style and ensure long-lasting results. Searching through endless options often leads to frustration, especially when you want your home to look professionally finished.
Make your next step easy and rewarding. Explore the wide selection of premium tiles available at BELK Tile. Whether you need bold glass mosaics, modern porcelain, or timeless natural stone, you will find detailed product info and stunning visuals to help you decide. Still unsure about what fits your project best? Get inspired by the ideas featured in our inspiration and ideas section. For a reliable solution that matches the quality of your hard work, visit our main site today and shop tiles that can transform your space from start to finish.
Frequently Asked Questions
How do I prepare my workspace for tile installation?
Begin by clearing the area of all furniture and existing flooring. Ensure the surface is clean by sweeping and vacuuming to remove any dust or debris. Check the underlying surface for levelness and moisture issues to prevent future problems with tile adhesion.
What tools do I need for tile installation?
Essential tools for tile installation include a tile cutter or wet saw, measuring tape, level, notched trowel, tile spacers, grout float, mixing bucket, safety glasses, knee pads, tile adhesive, grout, and grout sealer.
How can I ensure precise tile layout and measurements?
To achieve accurate measurements, use a quality metal measuring tape and record your dimensions on graph paper. Create a detailed layout plan by dry laying tiles to visualize placement before using adhesive. Always include an extra 10% of tiles in your material calculations to accommodate cuts and breakage.
What type of grout should I use for my tile installation?
The type of grout you should use depends on the width of the tile joints. Sanded grout is ideal for wider joints, while unsanded grout is better for narrow gaps. Always follow the manufacturer’s instructions for mixing and applying grout to ensure the best results.
Recommended


