How to Clean Tile Floors Naturally: A Step-by-Step Guide
Posted by Mike Belk on Oct 12, 2025

Natural tile floor cleaning sounds simple until you realize that the main cleaning agent in most eco-friendly routines is basic white vinegar mixed with warm water. You might expect fancy products or harsh chemicals to do the heavy lifting. Surprisingly, the humble combination of vinegar and water can make your floors sparkle without leaving any harmful residue behind.
Table of Contents
- Step 1: Gather Your Cleaning Supplies
- Step 2: Sweep or Vacuum the Tile Floor
- Step 3: Prepare the Cleaning Solution
- Step 4: Mop the Tile Floors Thoroughly
- Step 5: Rinse and Dry the Floors
- Step 6: Inspect for Residue and Finish
Quick Summary
| Key Point | Explanation |
|---|---|
| 1. Gather natural cleaning supplies | Collect items like white vinegar, microfiber mop, and warm water to clean tiles without chemicals. |
| 2. Clean tile floors before mopping | Remove dust and debris by sweeping or vacuuming to prepare for effective cleaning. |
| 3. Prepare an effective cleaning solution | Mix a solution of one cup of vinegar to one gallon of warm water for best cleaning results. |
| 4. Mop using a careful technique | Use a damp microfiber mop, moving in a figure-eight pattern to clean thoroughly without oversaturating. |
| 5. Inspect for residues post-cleaning | Examine floors for any remaining dirt or cleaning solution, ensuring a pristine finish before concluding. |
Step 1: Gather Your Cleaning Supplies
Cleaning tile floors naturally begins with carefully selecting and assembling the right tools and ingredients. Unlike conventional cleaning methods that rely on harsh chemical solutions, natural tile floor cleaning requires a thoughtful approach to both effectiveness and environmental responsibility.
To start your natural tile floor cleaning journey, you will need a strategic collection of supplies that are both powerful and gentle. The essential toolkit for natural tile floor cleaning should include microfiber mops, soft-bristled brushes, white vinegar, warm water, and a few additional natural cleaning agents.
Your primary cleaning arsenal will consist of several key items:
- Large microfiber mop with washable cleaning pads
- Soft-bristled scrub brush
- Bucket for mixing cleaning solutions
- White distilled vinegar
- Warm water
- Spray bottle
- Clean, soft towels or cloths for drying
While gathering these supplies, consider the specific type of tile you are cleaning. Ceramic, porcelain, and natural stone tiles might require slightly different approaches, so having versatile tools becomes crucial. A microfiber mop provides superior cleaning performance compared to traditional cotton mops, as its fine fibers can effectively trap dirt and moisture without leaving residue.
The white vinegar will serve as your primary natural cleaning agent, capable of cutting through grime and disinfecting surfaces without introducing toxic chemicals. When mixed with warm water in the correct proportions, vinegar creates an incredibly effective cleaning solution that is safe for most tile surfaces.
Before beginning your cleaning process, inspect your tools and ensure everything is clean and in good condition. Dirty or worn-out cleaning implements can potentially scratch or damage tile surfaces. Your soft-bristled brush will be particularly useful for addressing grout lines and stubborn spots that require more focused attention.
Here is a table organizing the essential tools and materials needed for natural tile floor cleaning, along with their requirements and primary purposes.
| Tool/Material | Requirement/Type | Purpose |
|---|---|---|
| Microfiber Mop | Large, washable pads | Traps dirt and moisture, effective cleaning |
| Soft-Bristled Brush | Gentle bristles | Scrubs grout, tackles stubborn spots |
| Bucket | Clean, sturdy | Mixing solutions and rinsing mop |
| White Distilled Vinegar | Standard household, undiluted | Primary natural cleaning agent |
| Warm Water | Should be clean | Dissolves vinegar, lifts dirt |
| Spray Bottle | Clean, unused | Spot application of cleaning solution |
| Towels/Cloths | Clean, soft, absorbent | Drying and wiping tiles after cleaning |
By meticulously preparing your natural cleaning toolkit, you set the stage for a successful, environmentally friendly tile floor cleaning experience that will leave your surfaces sparkling and well-maintained.
Below is a summary of the main steps for cleaning tile floors naturally, including what you accomplish and key verification checks for each stage.
| Step | Main Action | Key Outcome | Verification Check |
|---|---|---|---|
| 1. Gather Supplies | Assemble tools and safe cleaning agents | Prepared, organized toolkit | All items clean and ready |
| 2. Sweep/Vacuum | Remove dust, dirt, debris | Floor free of loose particles | Visual check of floor and tool for collected dirt |
| 3. Prepare Solution | Mix vinegar and warm water | Proper cleaning solution for tile type | Solution appears uniform and clear |
| 4. Mop Thoroughly | Apply solution with microfiber mop | Evenly cleaned, grime-free surface | Surface looks and feels clean |
| 5. Rinse & Dry | Remove cleaner, dry surface | No residue or streaks, dry floor | No visible water spots, surface is dry |
| 6. Inspect & Finish | Check for residue or missed spots | Pristine, residue-free tiles and grout | Smooth, clean, odor-free finish |
Step 2: Sweep or Vacuum the Tile Floor
Preparing your tile floor for a thorough natural cleaning requires meticulous initial debris removal. This crucial preparatory step ensures that loose dirt, dust, and particulate matter are completely eliminated before introducing any moisture to the surface.
Choosing the right tool for initial floor cleaning depends on your specific tile type and floor condition. For most tile surfaces, you have two primary options: sweeping with a soft-bristled broom or using a vacuum cleaner with appropriate attachments. The goal is comprehensive debris removal without causing any surface scratching or damage.
If using a broom, select one with soft, fine bristles that can effectively capture dust and small particles without abrading your tile surface. Begin at the farthest corner of the room and systematically work toward the exit, using smooth, controlled sweeping motions. Pay special attention to corners, edges, and areas around fixtures where dust and debris tend to accumulate.
For those preferring vacuum cleaning, select a machine with a soft brush attachment and ensure the beater bar is disengaged. Hard plastic or metal attachments can potentially scratch delicate tile surfaces, so gentle suction with a soft brush is paramount. Move the vacuum slowly and methodically across the entire floor, overlapping your passes to guarantee complete coverage.
Certain tile types require extra caution during this preliminary cleaning stage. Natural stone tiles like marble or travertine are more porous and delicate, necessitating extremely gentle cleaning techniques. For these surfaces, a microfiber dust mop might be the most appropriate choice, as it can collect fine particles without risking surface damage.
As you sweep or vacuum, look for signs of accumulated dirt in grout lines or challenging areas. These zones often require additional attention and might need targeted cleaning with your soft-bristled brush from the previous step. By thoroughly removing loose debris, you create an optimal surface for the subsequent natural cleaning process.
Verify the effectiveness of your initial cleaning by checking your broom or vacuum collection area. A substantial amount of collected dust and debris indicates a successful preliminary cleaning. If you notice significant dirt accumulation, consider repeating the process to ensure the most pristine starting point for your natural tile floor cleaning method.

Step 3: Prepare the Cleaning Solution
Creating a natural, effective cleaning solution for tile floors requires precision and understanding of the specific materials you are working with. The right mixture can transform your cleaning process from a mundane task to an environmentally friendly and thoroughly effective approach.
White distilled vinegar emerges as the cornerstone of natural tile floor cleaning, offering powerful cleaning properties without introducing harmful chemicals. The ideal cleaning solution typically involves a careful balance of vinegar and warm water, which works effectively across most tile surfaces while maintaining their integrity.
To prepare your cleaning solution, select a clean bucket and measure your ingredients with care. The standard recommended ratio is one cup of white vinegar to one gallon of warm water. This proportion provides sufficient cleaning power without risking damage to your tile surfaces. For tiles with more delicate compositions, such as natural stone, you might want to reduce the vinegar concentration to a quarter cup per gallon.
If you are dealing with particularly stubborn dirt or grease, you can enhance your basic vinegar solution with a few additional natural ingredients. A small amount of mild dish soap can provide extra degreasing power, while a few drops of essential oils like lemon or tea tree can introduce a pleasant fragrance and offer mild antibacterial properties.
Before mixing, ensure your bucket and all tools are completely clean to prevent introducing additional contaminants. Warm water helps the vinegar dissolve more effectively and can assist in breaking down dirt and grime more efficiently than cold water. Stir the solution gently but thoroughly to ensure proper integration of ingredients.
Specific tile types might require slight variations in your cleaning solution. Ceramic and porcelain tiles are generally more resilient, while natural stone tiles like marble or travertine demand more delicate treatment. Always test your solution on a small, inconspicuous area first to confirm compatibility and prevent potential surface damage.
Verify your solution’s readiness by checking its clarity and consistent color. The mixture should appear uniform, with no visible separation between water and vinegar. A gentle swirl should reveal a clean, transparent liquid ready for application. By taking the time to prepare your cleaning solution correctly, you set the stage for a successful, natural tile floor cleaning experience that preserves both the cleanliness and the integrity of your surfaces.
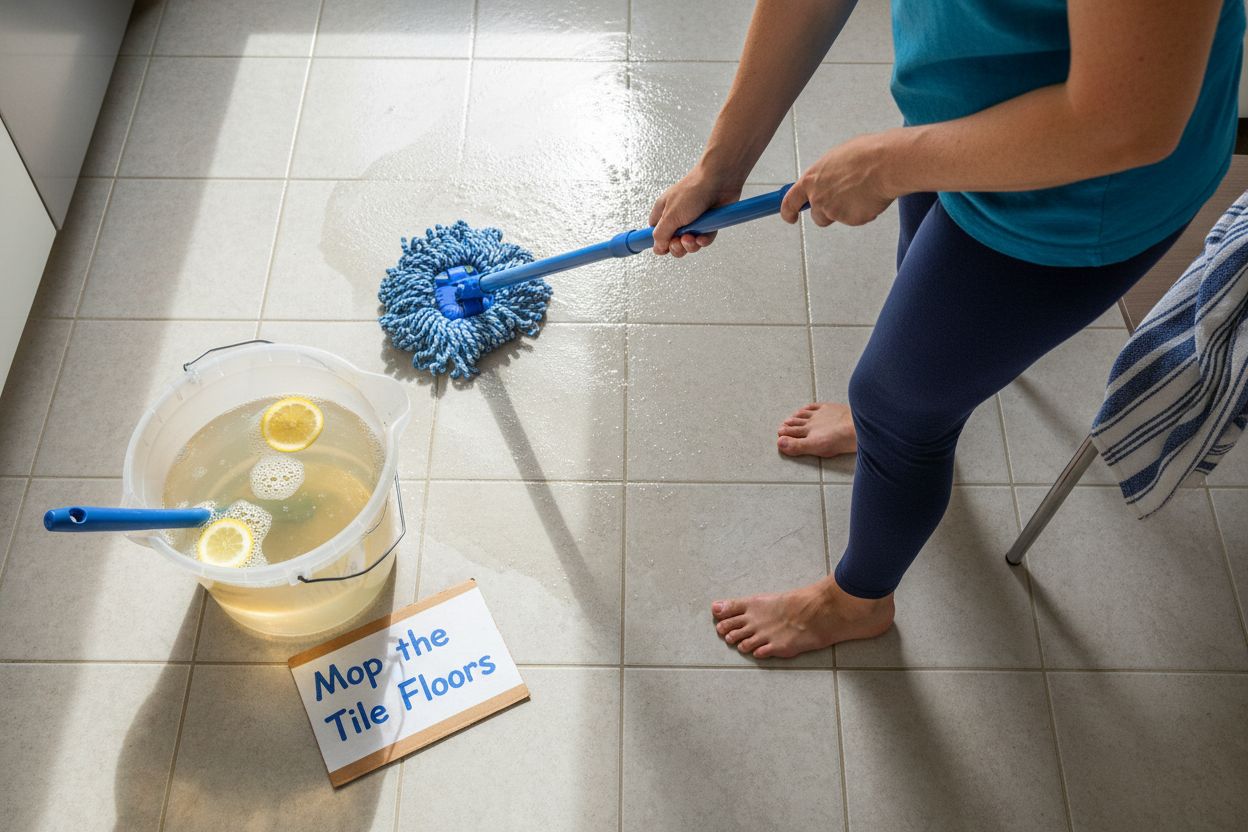
Step 4: Mop the Tile Floors Thoroughly
With your cleaning solution prepared and the floor swept, you are now ready to begin the most transformative stage of natural tile floor cleaning. Mopping requires a strategic approach that balances thorough cleaning with careful technique to protect your tile surfaces from potential damage.
Begin by dipping your microfiber mop into the prepared vinegar solution, ensuring it is thoroughly dampened but not dripping wet. Excess water can seep into grout lines and potentially cause long-term moisture issues. Learn more about maintaining tile surfaces with our expert cleaning tips.
The key to effective mopping is using a consistent, methodical technique. Start in the farthest corner of the room and work your way toward the exit, using smooth, overlapping strokes. This approach prevents you from walking on freshly cleaned areas and ensures comprehensive floor coverage. Move the mop in a figure-eight pattern, which helps distribute the cleaning solution evenly and capture dirt more effectively than straight line motions.
Pay special attention to high-traffic areas and spots near entryways where dirt tends to accumulate. These zones might require additional passes or slightly more pressure to remove stubborn grime. Your soft-bristled brush from earlier can be strategically used for spot treatments on particularly challenging areas.
Rinse your microfiber mop frequently in the cleaning solution to prevent redistributing dirt across the floor. As the water in your bucket becomes visibly dirty, replace it with a fresh batch of your vinegar solution. This prevents creating new dirt streaks and ensures a consistently clean surface.
For tiles with textured surfaces or intricate patterns, use gentle but deliberate mopping motions. Slightly increase the pressure in these areas to ensure dirt is lifted from the small crevices and detailed sections. Be mindful not to oversaturate the floor, as excessive moisture can compromise grout integrity.
To verify the effectiveness of your cleaning, do a final visual inspection. The tile surface should appear uniformly clean, with no visible streaks or remaining dirt patches. Run your hand lightly across a few areas to confirm the smoothness and cleanliness of the surface. A successful mopping will leave your tile floors looking refreshed, vibrant, and naturally clean.
Step 5: Rinse and Dry the Floors
The final stages of natural tile floor cleaning are critical for preventing water spots, potential mineral deposits, and ensuring a streak-free, gleaming surface. Rinsing and drying represent the most nuanced part of the entire cleaning process, requiring precision and careful technique to maintain your tile’s pristine appearance.
Begin the rinsing process by preparing clean, warm water in a separate bucket. This water should be free from any cleaning solution residue. Use a clean microfiber mop or a fresh, soft cloth to gently rinse the entire floor surface, removing any remaining vinegar solution. Our comprehensive guide offers additional insights into maintaining tile surfaces.
The key to successful rinsing is using minimal water while ensuring complete solution removal. Work systematically across the floor, starting from the farthest corner and moving toward the exit, just as you did during the mopping stage. Use gentle, overlapping strokes to prevent water pooling and to guarantee even coverage.
Immediate drying is crucial to prevent water absorption and potential water spot formation. Prepare several clean, soft towels or a high-quality microfiber drying cloth. For larger areas, consider using multiple towels to ensure thorough moisture removal. Begin drying immediately after rinsing, working quickly to prevent water from sitting on the tile surface.
When drying, apply light pressure and use a sweeping motion that follows the original mopping direction. This technique helps capture any remaining moisture and prevents streaking. Pay special attention to grout lines and areas around fixtures, where water tends to accumulate. For textured tiles, use a soft, absorbent cloth that can reach into small crevices and patterns.
For those with larger tile floors or limited time, a clean, dry microfiber mop with no cleaning solution can serve as an efficient drying tool. Move the dry mop across the surface in smooth, continuous motions, allowing it to absorb any remaining moisture.
Verify the effectiveness of your rinsing and drying by conducting a final visual and tactile inspection. The floor should appear uniformly clean, with no visible water spots, streaks, or damp areas. Run your hand lightly across the surface to confirm its dryness and smoothness. A properly rinsed and dried tile floor will look refreshed, feel clean to the touch, and showcase the natural beauty of your tiles.
Step 6: Inspect for Residue and Finish
The final stage of natural tile floor cleaning involves a comprehensive inspection that ensures your meticulous efforts have produced the desired results. This critical evaluation goes beyond simply admiring your clean floor and focuses on detecting any potential cleaning residues or areas requiring additional attention.
Learn more about maintaining tile surfaces with our expert preservation techniques. Begin your inspection by examining the floor from multiple angles, utilizing both natural and artificial lighting to reveal subtle details that might be missed during initial cleaning.
Systematic inspection requires careful observation of several key areas. Start by checking grout lines for any remaining dirt or cleaning solution residue. These narrow spaces often retain moisture and can harbor microscopic debris that escaped earlier cleaning stages. Use a soft, clean cloth to gently run along grout lines, verifying their cleanliness and ensuring no vinegar solution remains trapped.
Move systematically across the floor, examining each tile section methodically. Look for potential issues such as water spots, streaks, or slight discoloration that might indicate incomplete cleaning or solution buildup. Pay special attention to areas near baseboards, under furniture, and in corners where dirt and cleaning solution can accumulate unnoticed.
For tiles with textured surfaces, use your fingertips to feel for any remaining grit or sticky residue. Your tactile senses can detect subtle variations that visual inspection might miss. Smooth, natural stone tiles and glossy ceramic surfaces should feel uniformly clean and silky to the touch, with no rough or tacky sections.
If you discover any remaining residue, prepare a clean, damp microfiber cloth with plain warm water. Gently go over the problematic areas, using minimal moisture to avoid reintroducing wetness to the floor. For stubborn spots, a soft-bristled brush can provide targeted cleaning without risking surface damage.
The final verification of your cleaning process involves a comprehensive sensory assessment. The floor should look uniformly clean, feel smooth and dry, and emit a fresh, neutral scent without any lingering vinegar smell. Properly cleaned tile floors should reflect light subtly, showcasing their natural beauty and the careful attention you’ve invested in their maintenance.
Discover Lasting Beauty and Easier Cleaning With the Right Tile
If you are committed to keeping your tile floors naturally clean and healthy, you know the struggle of fighting grime without relying on harsh chemicals. Your journey for a spotless home often starts with the right tools and eco-friendly solutions, but it only truly succeeds when your tile surfaces themselves support easy maintenance and durability. Old, stained, or low-quality tiles can undermine your efforts, making every cleaning session feel like an uphill battle.
Imagine transforming your space with tiles that are stunning to look at and simple to keep fresh. At BELK Tile, you can explore an wide selection of high-quality tile options, ranging from classic porcelain to elegant natural stone and stylish glass mosaic. Our curated collections offer low-porosity surfaces and fine finishes that work hand in hand with the natural cleaning routines you just learned, helping you achieve a cleaner, healthier home more effortlessly. Ready to refresh your floors and experience the difference quality tile can make? Browse our bestsellers at BELK Tile and find inspiring ideas in our bathroom tile inspiration section. Take the next step for a more beautiful and manageable home today.
Frequently Asked Questions
How do I prepare my tile floor for natural cleaning?
To prepare your tile floor for natural cleaning, start by sweeping or vacuuming to remove loose dirt and debris. Choose a soft-bristled broom or a vacuum with a gentle brush attachment and work from the farthest corner of the room towards the exit.
What natural ingredients are effective for cleaning tile floors?
White distilled vinegar is the primary natural ingredient effective for cleaning tile floors, combined with warm water. Mix one cup of vinegar with one gallon of warm water for most tile surfaces; reduce the vinegar for delicate natural stone tiles to a quarter cup per gallon.
How should I mop my tile floors after applying the cleaning solution?
Mop your tile floors using a microfiber mop dipped in the vinegar solution, ensuring it is damp but not dripping. Start from the farthest corner, move in overlapping strokes, and pay extra attention to high-traffic areas where dirt accumulates.
What should I do after mopping to ensure my tile floors are clean?
After mopping, prepare clean, warm water to rinse the floor and remove any remaining cleaning solution. Use a clean mop or cloth to gently rinse and dry the tiles immediately, preventing water spots and maintaining their shine.
How can I check for residue on my tile floors after cleaning?
Inspect your tile floors from different angles and check grout lines for any remaining residue or streaks. If you notice any, use a damp cloth or a soft-bristled brush to gently clean those areas until they feel smooth and clean to the touch.
Is there a specific technique for drying tile floors effectively?
To dry tile floors effectively, use clean, soft towels or a dry microfiber mop to quickly absorb remaining moisture. Begin drying immediately after rinsing, applying light pressure to capture moisture and prevent streaks on the surface.
Recommended


