How to Calculate Tile Needed for Your Project
Posted by Mike Belk on Sep 10, 2025

Measuring for tile might sound simple. Most DIYers just grab a tape measure and start jotting down numbers. But nearly 1 in 5 tiling projects end up costing more than expected because of measurement mistakes or wasted tile. Getting the math right does more than save money. It’s the secret to a stress-free, flawless finish that actually fits your space.
Table of Contents
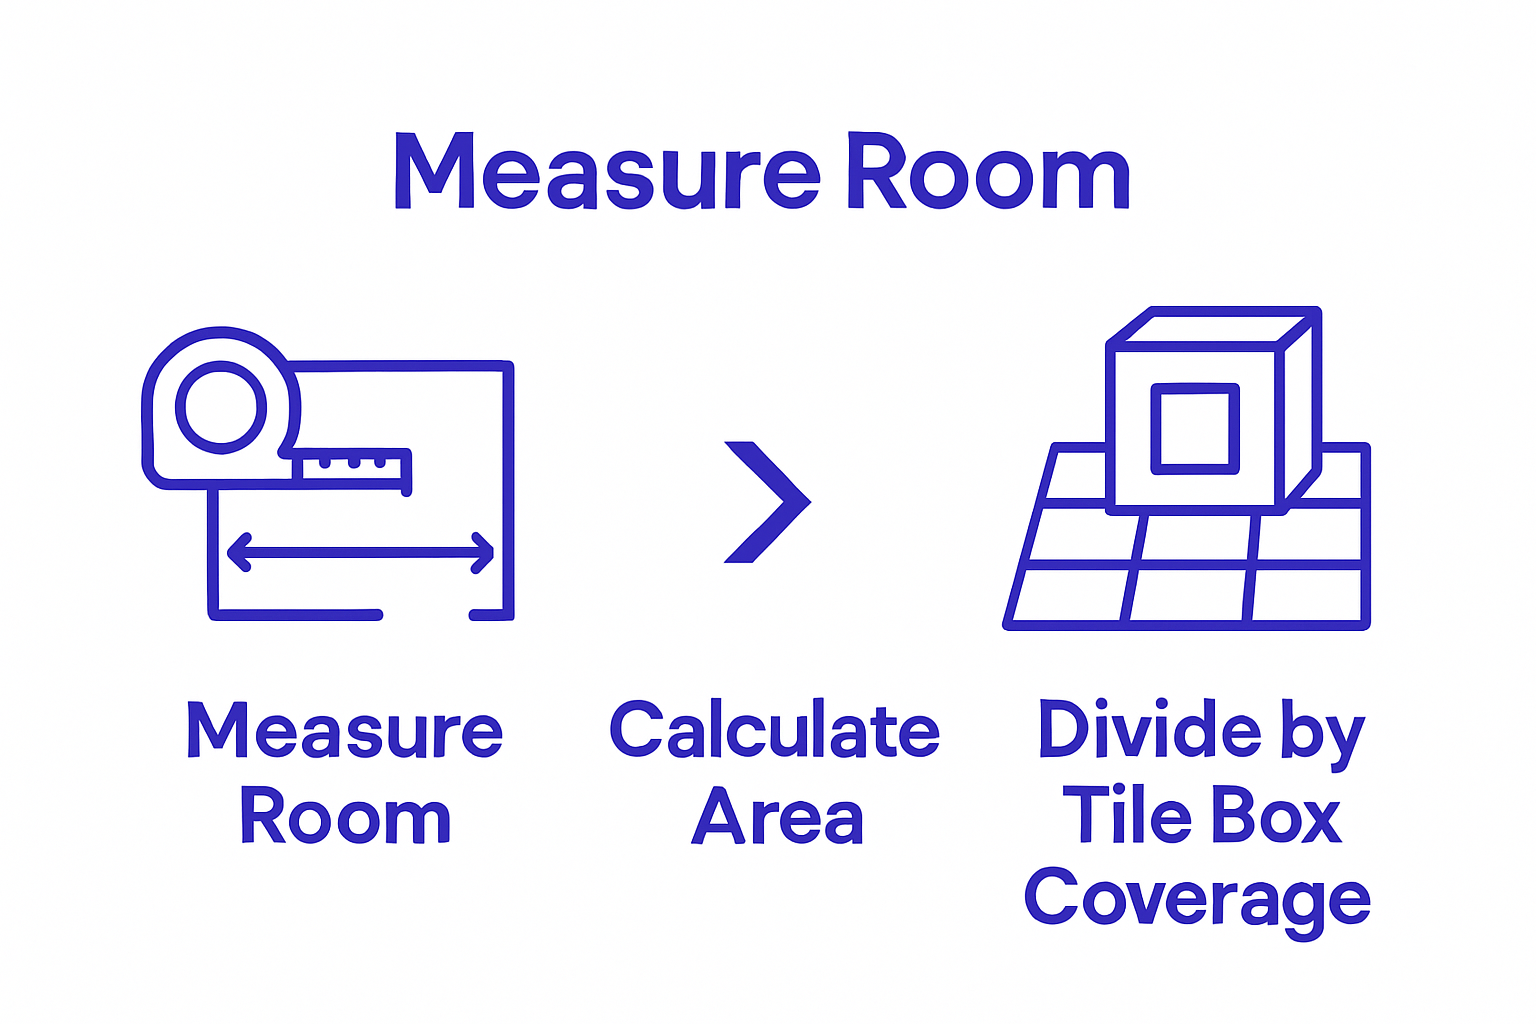
- Step 1: Measure Your Space Accurately
- Step 2: Determine The Tile Size You Want
- Step 3: Calculate The Area To Be Tiled
- Step 4: Apply The Tile Coverage Calculation
- Step 5: Factor In Waste And Extra Tile
- Step 6: Confirm Your Total Tile Requirement
Quick Summary
| Key Point | Explanation |
|---|---|
| 1. Measure Your Space Accurately | Start by measuring the length and width of the area to ensure precision before buying tiles. |
| 2. Choose the Right Tile Size | Select tile dimensions to optimize aesthetics and installation based on the room’s size and purpose. |
| 3. Calculate the Area to Be Tiled | Break down complex spaces into geometric shapes to accurately calculate the total square footage needed for tiling. |
| 4. Factor in Waste and Extra Tiles | Always add 10-15% extra tiles to account for cuts, breakage, and future repairs during installation. |
| 5. Confirm Your Total Tile Requirement | Double-check calculations and ensure the correct number of tile boxes is ordered for your project. |
Step 1: Measure Your Space Accurately
Accurately measuring your space is the critical first step in calculating how many tiles you’ll need for your project. Precision matters because even small measurement errors can lead to significant material waste or insufficient tile coverage. Before purchasing a single tile, you must understand the exact dimensions of the area you plan to tile.
To begin, gather essential measuring tools: a reliable tape measure, a pencil, graph paper, and a calculator. Start by clearing the area of furniture and obstacles to ensure unobstructed access. Measure the length and width of the space carefully, making sure to measure from wall to wall in multiple locations. Pro tip: Check for any irregularities like alcoves, corners, or uneven walls that might complicate your measurements.
For square or rectangular spaces, multiply the length by the width to determine the total square footage. If your area has an irregular shape, break it down into smaller rectangular sections and calculate each section separately, then add the totals together. Remember to measure in the same unit of measurement - most tile calculations use square feet.
Consider potential challenges like:
- Uneven surfaces that might require extra tile for cutting
- Decorative patterns that need precise tile alignment
- Spaces with complex architectural features
Pro contractors recommend adding 10% extra tiles to your calculated amount to account for cuts, breakage, and future replacements. This buffer ensures you have enough materials to complete your project without unexpected interruptions. Take your time during this measuring phase, as accuracy here saves time, money, and frustration later in your tiling project.
Verify your measurements by:
- Double-checking all calculations
- Measuring the space at least twice
- Confirming measurements with another person
Once you have precise measurements, you’re ready to move on to selecting the right tiles for your specific space and design vision.
Step 2: Determine the Tile Size You Want
Selecting the right tile size is more than just an aesthetic choice - it dramatically impacts your project’s overall look, installation complexity, and material requirements. Tile size influences everything from visual perception of space to the number of tiles you’ll ultimately need. Your initial measurements will now guide you in choosing the most appropriate tile dimensions for your specific project.
Consider the room’s size and purpose when selecting tile dimensions. Larger spaces typically benefit from bigger tiles, which create a sense of openness and reduce grout lines. Smaller rooms, conversely, often look more balanced with medium or smaller format tiles that prevent the space from feeling overwhelmed. For instance, a spacious living room might shine with 24x24 inch porcelain tiles, while a compact bathroom could look more proportional with 12x12 inch ceramic tiles.
Beyond visual considerations, tile size directly impacts your material calculations. Larger tiles mean fewer individual pieces to cover the same area, which can simplify installation and reduce labor costs. However, they also require more precise cutting and may create more waste during installation. Read more about choosing the right tile dimensions for different spaces to refine your selection strategy.
When evaluating tile sizes, examine these critical factors:
- Room dimensions and layout
- Intended aesthetic and design style
- Practical installation requirements
- Potential cutting and waste considerations
Pro tip: Always purchase slightly more tiles than your exact measurements suggest. Tiles can break during cutting, and having extra ensures you can complete your project without unexpected delays. Most professionals recommend purchasing 10-15% more tiles than your calculated square footage to account for cuts, breakage, and potential future repairs.
Verify your tile size selection by:
- Visualizing tile layout using digital design tools
- Obtaining physical tile samples
- Consulting with design professionals if uncertain
By carefully matching tile size to your space’s unique characteristics, you’ll create a visually stunning and functionally sound tiling project.
Step 3: Calculate the Area to Be Tiled
Calculating the precise area to be tiled is a crucial step that transforms your initial measurements into an actionable plan. Accurate area calculation prevents costly material shortages or unnecessary purchases. Building on your previous measurements, you’ll now determine the exact square footage that requires tiling, accounting for every nuance of your space.
Start by sketching a detailed floor plan, breaking down complex spaces into manageable geometric shapes. For rectangular or square areas, multiply length by width to determine square footage. Irregular spaces require a more strategic approach. Divide the area into smaller rectangles, triangles, or other basic shapes, calculate each section’s area separately, then add them together for a comprehensive total. Check out our guide on choosing the right tile for specific spaces to help refine your area calculation strategy.
Pay special attention to areas that might require additional tile coverage. Alcoves, niches, architectural features, and spaces behind fixtures like toilets or kitchen islands need careful measurement. Some homeowners forget to include these critical zones, leading to incomplete material estimates. Measure each section independently, adding them to your total square footage calculation.
Consider these essential calculation tips:
- Measure in consistent units (typically square feet)
- Include all vertical and horizontal surfaces being tiled
- Account for decorative borders or accent tile sections
- Measure twice to confirm accuracy
For more complex spaces, digital tools and laser measuring devices can provide precise measurements. These technologies help eliminate human error and provide exact square footage calculations. Some advanced measuring tools can even create digital floor plans, making area calculation more straightforward.
Verify your calculations by:
- Double-checking all mathematical computations
- Using multiple measurement methods
- Consulting with a professional if uncertain about complex spaces
By meticulously calculating your tiling area, you’ll ensure a smooth, efficient project with minimal waste and maximum aesthetic impact.
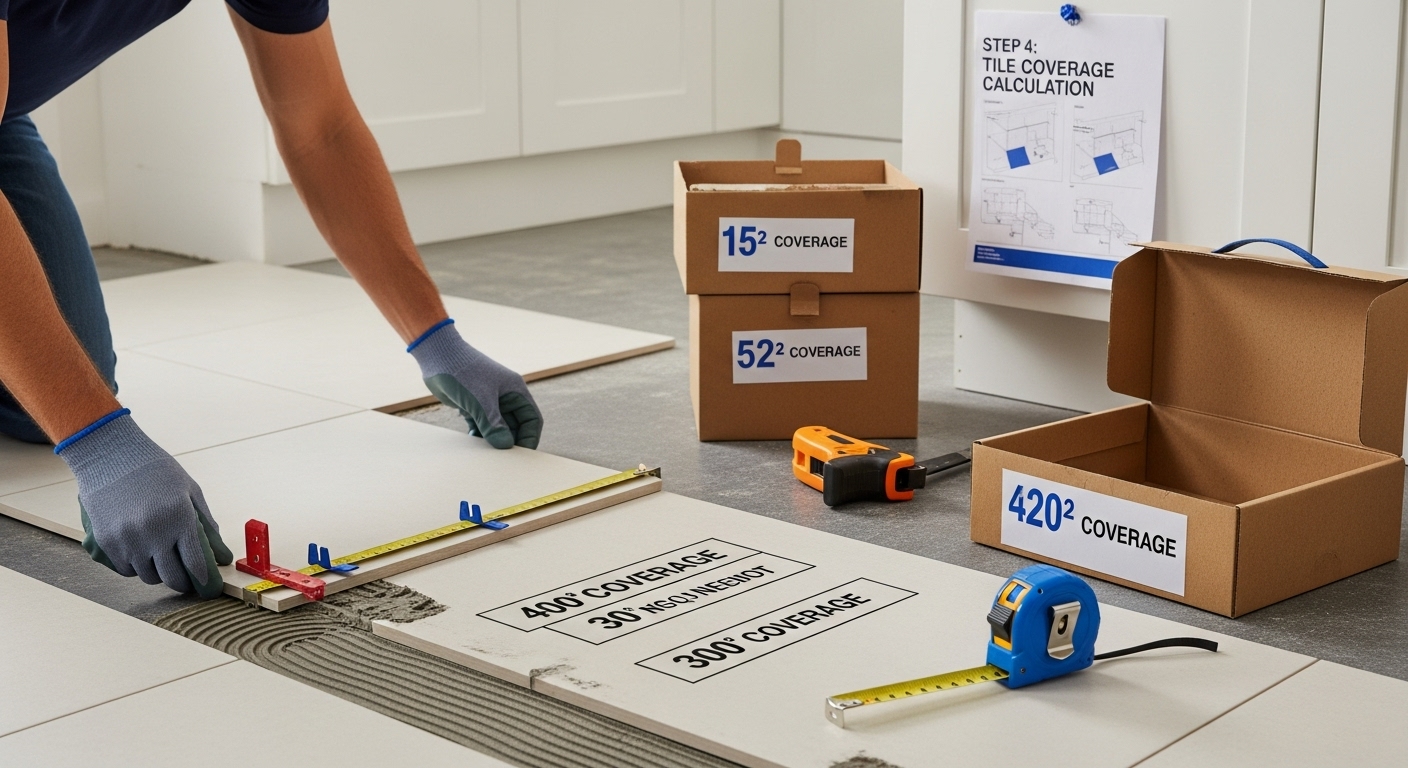
Step 4: Apply the Tile Coverage Calculation
Applying the tile coverage calculation transforms your measured area into a precise material requirement strategy. Tile coverage refers to the square footage a single tile or box of tiles can effectively cover, which becomes your critical blueprint for purchasing materials. This step bridges the gap between your measured space and the actual tiles you’ll need to purchase.
To calculate tile coverage, divide your total measured area by the coverage area of a single tile box. Most tile manufacturers print coverage information directly on the packaging, typically expressed in square feet per box. Pro tip: Always check the specific tile box, as coverage can vary dramatically between different tile types and sizes. Learn more about selecting the right tiles for your project to ensure accurate calculations.
Factor in additional considerations that impact your final tile count. Cutting waste typically requires purchasing 10-15% more tiles than your exact measurement. Complex layouts with diagonal patterns or intricate designs might necessitate even more additional tiles. Rooms with numerous obstacles like fixtures, cabinets, or unusual architectural features will increase cutting complexity and potential tile waste.
Consider these essential coverage calculation factors:
- Manufacturer’s stated tile coverage per box
- Potential cutting and installation waste
- Pattern complexity
- Room layout intricacies
Digital tile calculators can simplify this process, providing instant estimates based on your input. However, nothing replaces careful manual calculation and professional judgment. Some advanced calculators can even factor in grout lines, tile orientation, and potential waste percentages, giving you a more comprehensive material estimate.
Verify your coverage calculation by:
- Cross-referencing manufacturer specifications
- Consulting with tile installation professionals
- Comparing manual calculations with digital tool estimates
By meticulously applying the tile coverage calculation, you’ll purchase exactly the right amount of materials, minimizing waste and unexpected expenses while ensuring a smooth, professional installation.
Step 5: Factor in Waste and Extra Tile
Factoring in waste and extra tile is a critical step that separates amateur DIY projects from professional-quality installations. Professional tile setters always plan for the unexpected, understanding that cutting, breakage, and future repairs require strategic material planning. This step transforms your basic calculations into a comprehensive material procurement strategy.
Most tile professionals recommend adding 10-15% extra tiles beyond your calculated area, but the exact percentage depends on your specific project complexity. Intricate patterns, diagonal layouts, or rooms with numerous obstacles like cabinets and fixtures will require a higher waste percentage. Learn more about tile installation techniques to understand the nuances of material planning.
Cutting and installation waste represent the primary reasons for purchasing extra tiles. Cutting tiles around outlets, corners, and unique architectural features inevitably results in unusable tile fragments. Some cuts may be imperfect, requiring additional tiles to complete the project. Professional installers know that having a buffer stock prevents project delays and ensures a seamless final appearance.
Consider these critical factors when calculating extra tile:
- Room layout complexity
- Tile size and pattern
- Installation technique
- Number of architectural obstacles
- Potential future repairs
Beyond installation waste, maintaining a small inventory of matching tiles allows for future repairs. Tile styles and batches can change over time, making exact replacements challenging. Storing 2-3 extra full tiles in a cool, dry place ensures you can address chips, cracks, or damage without compromising your original design.
Verify your waste calculation by:
- Consulting with professional tile installers
- Using digital tile calculators
- Reviewing manufacturer recommendations
- Examining your specific room’s unique characteristics
By thoughtfully planning for waste and extra tiles, you’ll create a buffer that prevents frustration, ensures a professional finish, and provides peace of mind throughout your tiling project.
Step 6: Confirm Your Total Tile Requirement
Confirming your total tile requirement is the culmination of all previous calculations, transforming abstract numbers into a concrete purchasing strategy. Precision matters most at this critical stage, where your careful measurements, tile size selections, and waste calculations converge into a final material count. This step ensures you purchase exactly what you need without costly overbuying or frustrating shortages.
Review your calculations methodically, double-checking each component of your tile estimation. Start by revisiting your original room measurements, then multiply those dimensions by your selected tile size, adding the 10-15% waste buffer you calculated earlier. Explore our comprehensive guide to selecting the right bathroom tiles to cross-reference your calculations and ensure comprehensive coverage.
Professional tip: Convert your calculations into actual tile boxes. Most tile manufacturers package their products in boxes with predetermined square footage, so you’ll need to round up to the nearest full box. This means your carefully calculated area might require purchasing slightly more tiles than your exact mathematical result. Understanding packaging specifications prevents last-minute purchasing scrambles and ensures consistent tile quality from the same production batch.
Consider these critical verification steps:
- Confirm total square footage needed
- Calculate exact number of tile boxes required
- Verify tile batch numbers match
- Account for potential future replacements
- Double-check measurements with another person
Utilize multiple verification methods to guarantee accuracy. Digital tile calculators, professional consultation, and manual cross-referencing can provide additional confidence. Some tile retailers offer free consultation services where experts can review your calculations and provide personalized recommendations.
Below is a checklist table to help you verify each part of your tile calculation and purchasing process based on the recommended verification steps mentioned in the guide.
| Step to Verify | Verification Method | Why It Matters |
|---|---|---|
| Double-check all measurements | Measure space twice; confirm with another person | Prevents costly errors |
| Revisit area calculations | Use manual math and digital tools | Ensures accurate square footage |
| Confirm tile size matches project needs | Review samples and consult design tools | Aligns with design vision |
| Calculate and add 10-15% extra for waste | Apply recommended buffer based on project | Accounts for cuts and breakage |
| Convert area to number of tile boxes | Refer to manufacturer specifications | Avoids buying too few tiles |
| Check tile batch numbers | Compare packaging details | Ensures visual consistency |
| Consult with professionals (optional) | Seek advice from installers or retailers | Extra assurance for accuracy |
Verify your total tile requirement by:
- Consulting with tile installation professionals
- Using multiple calculation methods
- Reviewing manufacturer packaging specifications
- Checking tile availability and potential batch variations
By meticulously confirming your total tile requirement, you transform careful planning into a successful tiling project, minimizing waste and ensuring a professional, polished result.
Ready to Turn Your Tile Calculations Into a Beautiful Reality?
After meticulously measuring your space, considering tile size, and calculating waste as outlined in our article, the last thing you want is to face uncertainty about product selection, style, or reliable sourcing. Many homeowners and professionals worry about finding the right tiles that match their calculations and vision. The process can feel overwhelming — from ensuring durability and style to actually purchasing the correct number and type of tiles. BELK Tile offers a solution designed for you.
Explore our vast collection of tile options, including ceramic, porcelain, glass mosaic, and more — each showcased with images, specs, and filter tools to make matching your project needs easy and stress-free. Whether you are tackling a kitchen renovation or refreshing a bathroom, our high-quality tiles can help turn your planning into stunning results. Shop now to take advantage of our user-friendly browsing, quick-view options, and detailed product guides. Bring your tile calculations to life today and browse BELK Tile’s trusted solutions at https://www.belktile.com.
Frequently Asked Questions
How do I accurately measure my space for tiling?
To measure your space accurately, use a reliable tape measure to find the length and width of the area. Measure from wall to wall in multiple locations and account for any irregular shapes by breaking the space into smaller sections. Make sure to double-check your measurements for precision.
What tile size should I choose for my project?
Choose a tile size based on the room’s dimensions and purpose. Larger tiles are ideal for spacious areas, creating an open feel, while medium or smaller tiles are better for smaller rooms to prevent overwhelming the space. Consider the intended aesthetic and practical installation requirements when selecting sizes.
How do I calculate the area to be tiled?
To calculate the area, multiply the length by the width for rectangular or square spaces. For irregular shapes, divide the area into smaller manageable geometric shapes, calculate their individual areas, and then add them together for a total square footage of the space.
Why should I factor in extra tiles for my project?
Adding extra tiles (10-15%) is crucial to account for cuts, breakage, and future repairs. Cuts around fixtures or complex layouts often result in waste, and having extra tiles on hand ensures that you can complete the project without delays or mismatched tiles in case of repairs.
Recommended


