Master How to Measure for Tile: A Step-by-Step Guide
Posted by Mike Belk on Oct 08, 2025

Getting ready to tile a room might look simple at first. Measure some walls and you are off, right? Not quite. Even experienced DIYers make costly mistakes when a single inch gets missed or a corner goes unaccounted for. Most people are shocked that professionals typically buy 10 to 15 percent more tile than the official measurements call for. That extra bit prevents frustrating shortages and mismatched floors. Skipping these strategic steps can turn what looks like an easy weekend project into a series of expensive surprises.
Table of Contents
- Step 1: Prepare Your Space For Measuring
- Step 2: Select The Right Tools For Accurate Measurement
- Step 3: Measure The Length And Width Of The Area
- Step 4: Calculate The Total Square Footage Needed
- Step 5: Account For Waste And Tile Cuts
- Step 6: Verify Your Measurements Before Tile Purchase
Quick Summary
| Key Point | Explanation |
|---|---|
| 1. Thoroughly prepare your space | Clear and clean the installation area to ensure precise measurements and avoid errors. |
| 2. Use professional-grade measuring tools | Invest in high-quality measuring devices to enhance accuracy and minimize costly mistakes during tile installation. |
| 3. Measure lengths and widths accurately | Systematically measure the room’s dimensions taking multiple readings to ensure consistency due to irregular surfaces. |
| 4. Add 10% for waste and cuts | Consider extra tiles to accommodate cuts and waste, ensuring you have enough material throughout the project. |
| 5. Verify measurements before purchasing | Cross-check all measurements and calculations to prevent errors and ensure a smoother installation process. |
Step 1: Prepare Your Space for Measuring
Before diving into tile measurements, proper preparation sets the foundation for a successful installation. Preparing your space thoroughly minimizes potential errors and ensures accurate measurements that will guide your entire tiling project.
Begin by completely clearing the area where you plan to install tiles. Remove all furniture, rugs, appliances, and any existing floor coverings. This gives you an unobstructed view and access to the entire surface. Clean the area meticulously, sweeping or vacuuming to eliminate dust, debris, and loose particles that could interfere with precise measurements.
Next, inspect the surface carefully. Look for any irregularities like uneven flooring, wall bumps, or structural imperfections that might impact your tile layout. Pay special attention to corners, edges, and transition areas where walls meet floors or where different surfaces connect. These spots often require extra consideration during measurement and can significantly affect your tile placement strategy.
Gather your essential measuring tools before starting. You will need:
- A quality tape measure with clear markings
- A long straightedge or level for checking surface evenness
- A pencil and notepad for recording measurements
- Chalk line for creating reference lines
- Laser measuring tool (optional but recommended for larger spaces)
Before taking measurements, decide on your tile orientation and pattern. Will you lay tiles in a standard grid, diagonal pattern, or create a more complex design? This decision impacts how you’ll measure and calculate tile quantities. Understanding your intended layout helps you approach measurements with precision and confidence.
Verify that your surface is structurally sound and ready for tiling. Check for any moisture issues, cracks, or underlying problems that might need addressing before installation. Fixing these concerns now prevents potential complications during tile placement and ensures a stable foundation for your new surface.
By dedicating time to thorough preparation, you create a solid framework for accurate measurements and a successful tiling project. Careful preparation is not just about measuring—it’s about setting yourself up for a professional, polished result.
Step 2: Select the Right Tools for Accurate Measurement
Choosing the right measuring tools is critical to ensuring precision in your tile installation project. The accuracy of your measurements directly impacts the final appearance, fit, and professional look of your tiled surface.
Professional grade measuring tools are your first line of defense against costly installation errors. A standard tape measure might seem sufficient, but investing in high-quality measurement equipment can make a significant difference. Look for a tape measure with clear, bold markings and a locking mechanism that maintains its extended length without slipping. Metal tape measures with wider blades provide more stability when measuring longer distances, reducing potential measurement distortions.
A digital laser measuring device offers exceptional accuracy for larger spaces. These tools can quickly capture room dimensions with minimal effort, eliminating the challenges of manual measuring. Laser measures provide digital readouts that minimize human error and can store multiple measurements, making them invaluable for complex tiling projects.
For precise layout and alignment, consider these essential tools:
- Long spirit level for checking surface evenness
- Chalk line for creating straight reference lines
- Carpenter’s square for checking perfect 90-degree angles
- Digital angle finder for measuring complex room configurations
When selecting measuring tools, prioritize precision and durability. Cheaper tools might save money upfront but can lead to expensive mistakes during tile installation. Professional contractors often recommend investing in tools that provide consistent, reliable measurements.
Additionally, remember that different surfaces and tile types might require specialized measuring approaches. Irregular surfaces like natural stone or intricate mosaic installations demand more sophisticated measurement techniques. A combination of traditional and digital tools will help you navigate these challenges effectively.
Before beginning your measurement process, calibrate and test your tools.
Here is a summary table of essential measuring tools for tile installation, along with their primary functions and any special notes.
| Tool | Purpose | Special Notes |
|---|---|---|
| Tape Measure | Measure length and width of area | Choose one with clear, bold markings |
| Spirit Level | Check surface evenness | Long level preferred for accuracy |
| Laser Measuring Tool | Capture quick, accurate dimensions | Optional; ideal for large spaces |
| Chalk Line | Mark straight reference lines | Helpful for layout planning |
| Carpenter’s Square | Check for perfect 90-degree angles | Especially important in corners |
| Digital Angle Finder | Measure complex room angles | Useful for irregular configurations |
| Pencil and Notepad | Record all measurements | Keep measurements organized |
By carefully selecting and preparing your measuring tools, you’re setting the stage for a precise and professional tile installation that will look stunning and stand the test of time.
Step 3: Measure the Length and Width of the Area
Measuring the length and width of your tiling area is a precision task that requires patience and systematic approach. Accurate measurements are fundamental to determining the exact number of tiles needed and planning your installation strategy.
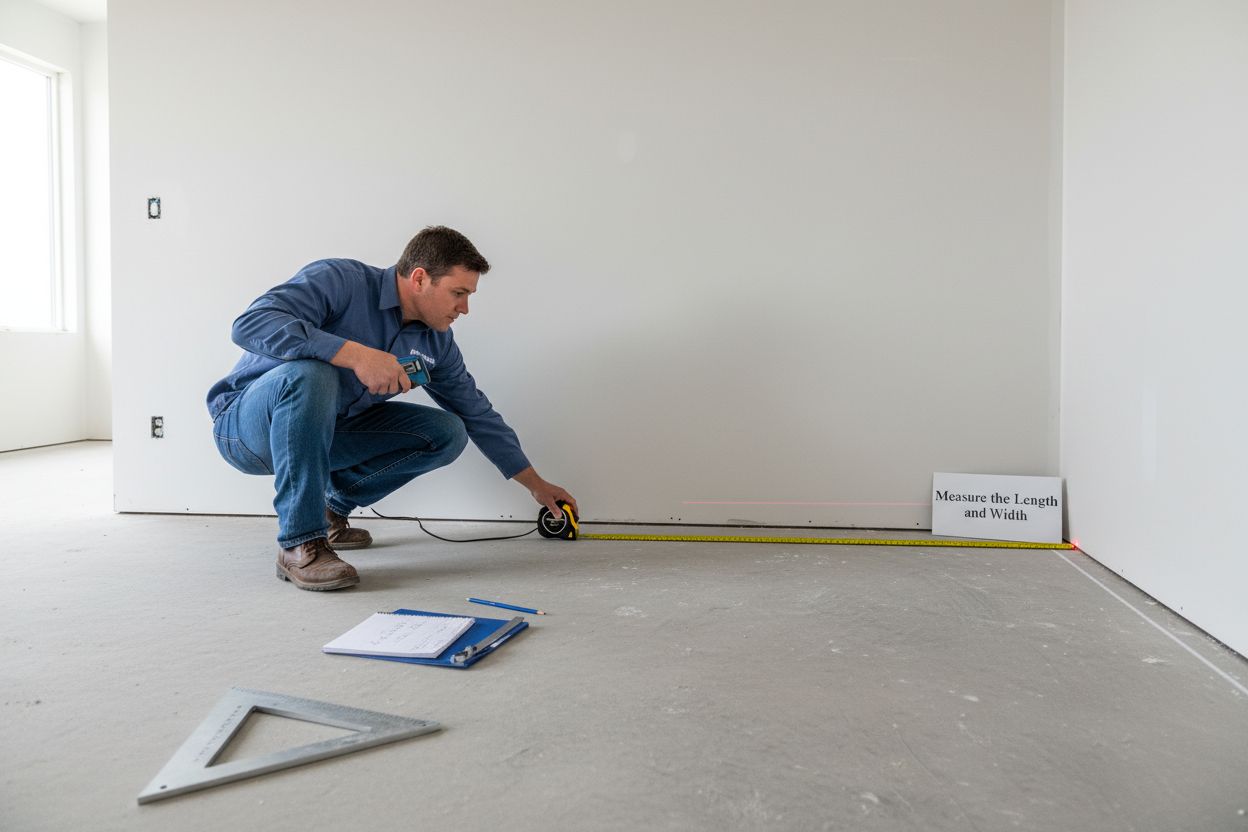
Start at one corner of the room and extend your tape measure along the base of the wall, ensuring the tape remains completely straight and flat. Pull the tape measure from one wall to the opposite wall, keeping it taut to avoid any sagging that could distort your measurement. Record the length carefully, double-checking your initial reading to confirm accuracy.
Repeat this process for the width of the room, measuring perpendicular to your first measurement. Measure from wall to wall, making sure your tape measure is parallel to the opposite wall and maintaining a consistent height along the base. Professional tilers recommend taking multiple measurements at different points to account for potential wall irregularities.
Special considerations are crucial when dealing with unique room shapes:
- For rectangular rooms, measure length and width at multiple points
- In rooms with alcoves or irregular corners, break the space into smaller, more manageable sections
- Account for obstacles like built-in cabinets, fixtures, or permanent installations
Be mindful of potential measurement challenges. Walls are not always perfectly straight, and floors might not be completely level. Use a level alongside your tape measure to check for any significant variations. If you discover substantial differences between measurements, you may need to plan for additional preparation or adjust your tiling approach.
Digital laser measuring tools can provide an additional layer of precision, especially in larger or more complex spaces. These devices can quickly capture room dimensions and store multiple measurements, reducing the potential for human error.
Once you have your measurements, calculate the total square footage by multiplying length by width.
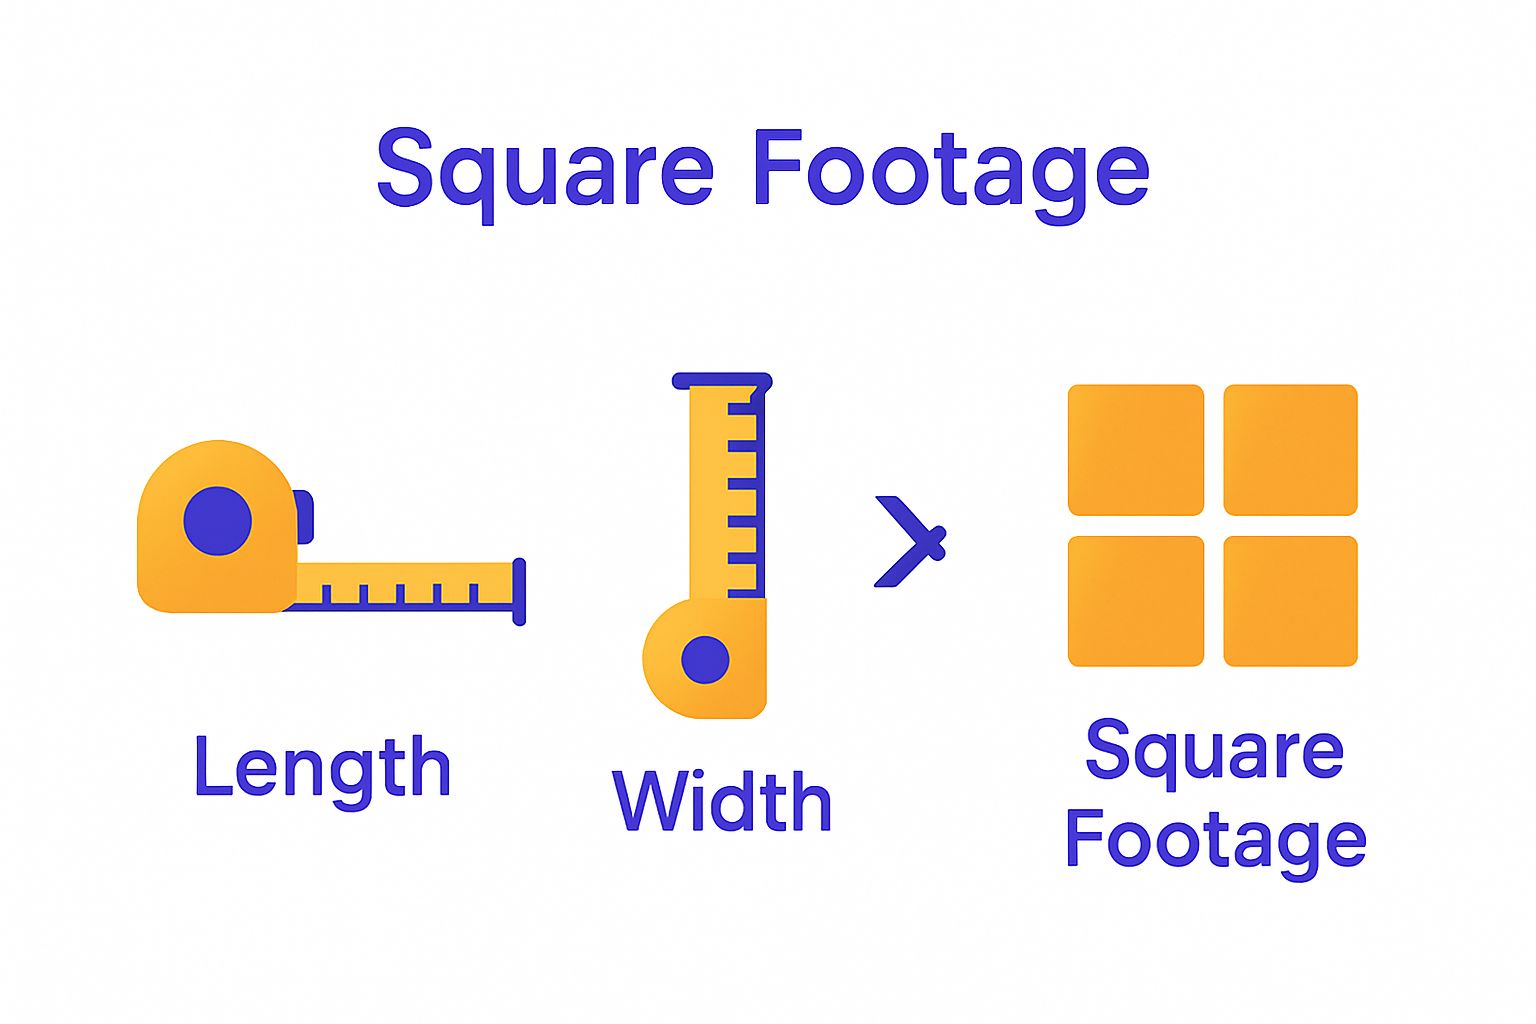 Always add 10% extra to your calculated area to account for cuts, waste, and potential future replacements. This buffer ensures you have enough tiles to complete the project without unexpected shortages.
Verify your measurements by comparing your written notes with digital calculations. A systematic, methodical approach to measuring will set a solid foundation for a successful tile installation project.
Step 4: Calculate the Total Square Footage Needed
Calculating square footage requires systematic precision and careful attention to detail. Your measurements from previous steps will now transform into the critical calculation that determines how many tiles you will need for your project.
Multiplying your length by width provides the basic area calculation. Multiply the room’s length by its width to determine the total square footage. For instance, a room 12 feet long and 10 feet wide would calculate to 120 square feet. This straightforward multiplication serves as your foundational measurement.
However, real-world spaces rarely conform to perfect geometric shapes. Rooms with irregular configurations or multiple sections require a more nuanced approach. Break complex spaces into smaller, more manageable rectangular sections. Calculate each section’s square footage separately, then add these together for a comprehensive total.
Consider these critical calculation considerations:
- Account for diagonal walls or angled spaces
- Subtract square footage for permanent fixtures like built-in cabinets
- Measure alcoves and recessed areas separately
Add a 10% overage to your total square footage to accommodate cutting waste, potential breakage, and future repairs. This buffer ensures you have sufficient tiles and prevents mid-project supply shortages. For a 120 square foot room, purchasing 132 square feet of tiles provides that essential margin of safety.
Precision matters when selecting tiles. Different tile sizes impact your calculation strategy. Large format tiles might require fewer pieces but demand more careful cutting, while smaller tiles create more intricate patterns with increased waste potential. Measure your chosen tile size carefully and compare it against your room’s total square footage.
Digital calculators and smartphone apps can help verify your manual calculations, providing an additional layer of confidence. Some advanced tools even allow you to input room dimensions and tile sizes to automatically calculate required quantities.
Before finalizing your purchase, double-check all measurements and calculations. Walk through the space again, confirm your numbers, and consider consulting with a professional tile retailer who can review your calculations and provide expert guidance.
A meticulous approach to calculating square footage sets the stage for a successful tile installation, ensuring you have exactly what you need to transform your space beautifully and efficiently.
Step 5: Account for Waste and Tile Cuts
Accounting for waste and tile cuts is a crucial step that transforms your theoretical measurements into a practical installation strategy. Professional tilers know that perfect tile layouts rarely happen without strategic cutting and planning. Learn how to master cutting techniques for precise tile installation.
Tile waste occurs during installation through necessary cuts around edges, corners, fixtures, and irregular room shapes. Plan for approximately 10-15% additional tiles beyond your calculated square footage. This buffer accommodates inevitable cuts, potential breakage, and future repair needs. For complex spaces with multiple angles or intricate layouts, consider increasing your waste allowance to 15-20%.
Different tile sizes and installation patterns dramatically impact cutting requirements. Larger format tiles might require fewer cuts but demand more precision, while smaller tiles create intricate patterns with increased cutting complexity. Rectangular rooms typically require less cutting than spaces with multiple angles or obstacles.
Consider these critical cutting scenarios:
- Cuts around door frames and transitional areas
- Fitting tiles near wall outlets and fixtures
- Creating custom fits for unique architectural elements
- Accommodating pipes, radiators, and built-in furniture
Invest in quality tile cutting tools that match your specific tile material. Ceramic tiles require different cutting approaches compared to natural stone or porcelain. Wet saws provide the most precise cuts for professional-looking results, especially with harder tile materials. Manual tile cutters work well for simpler projects and softer tile types.
Measure twice and cut once remains the golden rule. Create a detailed cutting diagram before beginning installation. Sketch out your room, marking exactly where cuts will be needed. This visual planning prevents wasteful mistakes and helps you understand exactly how many tiles require modification.
Remember that cutting tiles is both a science and an art. Practice on spare tiles to develop confidence and precision. Small, careful cuts create seamless installations that look professionally executed. By anticipating waste and preparing for strategic cutting, you transform a potentially challenging process into a smooth, successful tile project.
Step 6: Verify Your Measurements Before Tile Purchase
Verification is the critical final checkpoint before investing in tiles for your project. Measure twice, purchase once is the cardinal rule that prevents costly mistakes and ensures a successful installation. Understanding how to calculate tile quantities can save you significant time and money.
Begin your verification process by reviewing all previous measurements meticulously. Pull out your notebook or digital notes and cross-reference your initial measurements. Measure each wall and floor section multiple times, using different tools to confirm consistency. A laser measuring device and traditional tape measure can help validate your calculations.
Create a comprehensive worksheet that breaks down your measurements systematically. Document the length, width, and calculated square footage for each section of your space. Note any obstacles like built-in cabinets, fixtures, or architectural features that impact your tile layout. This detailed documentation serves as your roadmap and verification tool.
Consider these critical verification steps:
- Confirm measurements at different times of day
- Use multiple measuring tools for cross-validation
- Check measurements in both metric and imperial units
- Verify calculations with a second person
Professional tilers recommend adding a small buffer beyond your initial 10% waste calculation. Unusual room configurations, complex cutting requirements, or intricate tile patterns might necessitate additional tiles. Some experts suggest purchasing up to 15-20% extra to account for unexpected challenges.
Engaging with tile professionals or experienced retailers can provide an additional layer of verification. Many tile specialists offer free consultation and can review your measurements, offering insights into potential complications or recommending specific tile quantities based on your space.
Digital tools and smartphone apps can also assist in measurement verification. Some advanced applications allow you to input room dimensions, tile sizes, and installation patterns to calculate precise tile requirements. These technological aids can help confirm your manual calculations and provide peace of mind.
Final verification involves walking through your space one last time, measuring key areas, and double-checking your calculations.
This table summarizes key verification steps to ensure measurement accuracy before purchasing tiles for your project.
| Verification Step | Details or Action |
|---|---|
| Cross-reference with notes | Compare recent measurements with original recorded figures |
| Double-check measurements | Use tape measure and laser device for consistency |
| Document individual sections | List length, width, and square footage for each space |
| Confirm at different times of day | Helps account for lighting and visibility differences |
| Use multiple measuring tools | Improves reliability with both manual and digital devices |
| Check both unit systems | Review measurements in imperial and metric units if possible |
| Consult another person | Ask a second person to review or assist with measuring and calculations |
| Walk through space again | Final walkthrough to confirm no areas were missed |
Ready for Flawless Tile Results? Make Every Measurement Count
After following each step from clearing your space to calculating for waste, you know how critical accuracy is for tile projects. Even with the best guides, the stress of miscalculating or not finding the right products for your specific measurements can hold you back. With BELK Tile, you never have to second-guess if you are getting the right style, shape, or quantity. Our platform gives you access to detailed product specifications and makes it easy to find exactly what you need to match your measurements, whether your project is a simple backsplash or a complex, multi-room installation.
Do not let your perfect measurements go to waste. Start exploring our wide selection of high-quality tiles, tailored to your unique project needs. Visit BELK Tile’s homepage for inspiration, browse our collections with confidence, and experience shopping designed around reliability and precision. Act now to secure the ideal tiles and feel the satisfaction of turning your carefully planned space into a standout finished result. Your ideal tiling project begins at BELK Tile.
Frequently Asked Questions
How do I prepare my space before measuring for tile?
To prepare your space, clear the area of any furniture, rugs, and existing floor coverings. Clean the floor thoroughly to remove dust and debris. Inspect the surface for any irregularities that may affect tile placement.
What tools do I need to measure for tile installation?
You will need a tape measure, a long straightedge or level, a pencil and notepad for recording measurements, a chalk line for reference lines, and optionally, a laser measuring tool for larger spaces.
How do I calculate the total square footage needed for tile?
To calculate the total square footage, multiply the length of the area by its width. For rooms with irregular shapes, break the space into smaller sections, calculate each section separately, and then add them together.
Why do I need to account for waste and tile cuts?
Accounting for waste and tile cuts is important because cutting tiles is often necessary around edges and fixtures. Adding an extra 10-15% to your tile purchase helps cover cutting waste, potential breakage, and allows for future repairs.
Recommended


