Hotel Backsplash Installation Guide for Flawless Results
Posted by Mike Belk on Dec 15, 2025

Most American hotels know that even minor details like a backsplash can transform the look and feel of a space. With travelers expecting spotless finishes, a poorly installed backsplash stands out for all the wrong reasons. In fact, nearly 90 percent of guest feedback highlights cleanliness and design. This step-by-step guide shares smart strategies to help you achieve a professional backsplash installation that meets demanding American standards and leaves a lasting impression.
Table of Contents
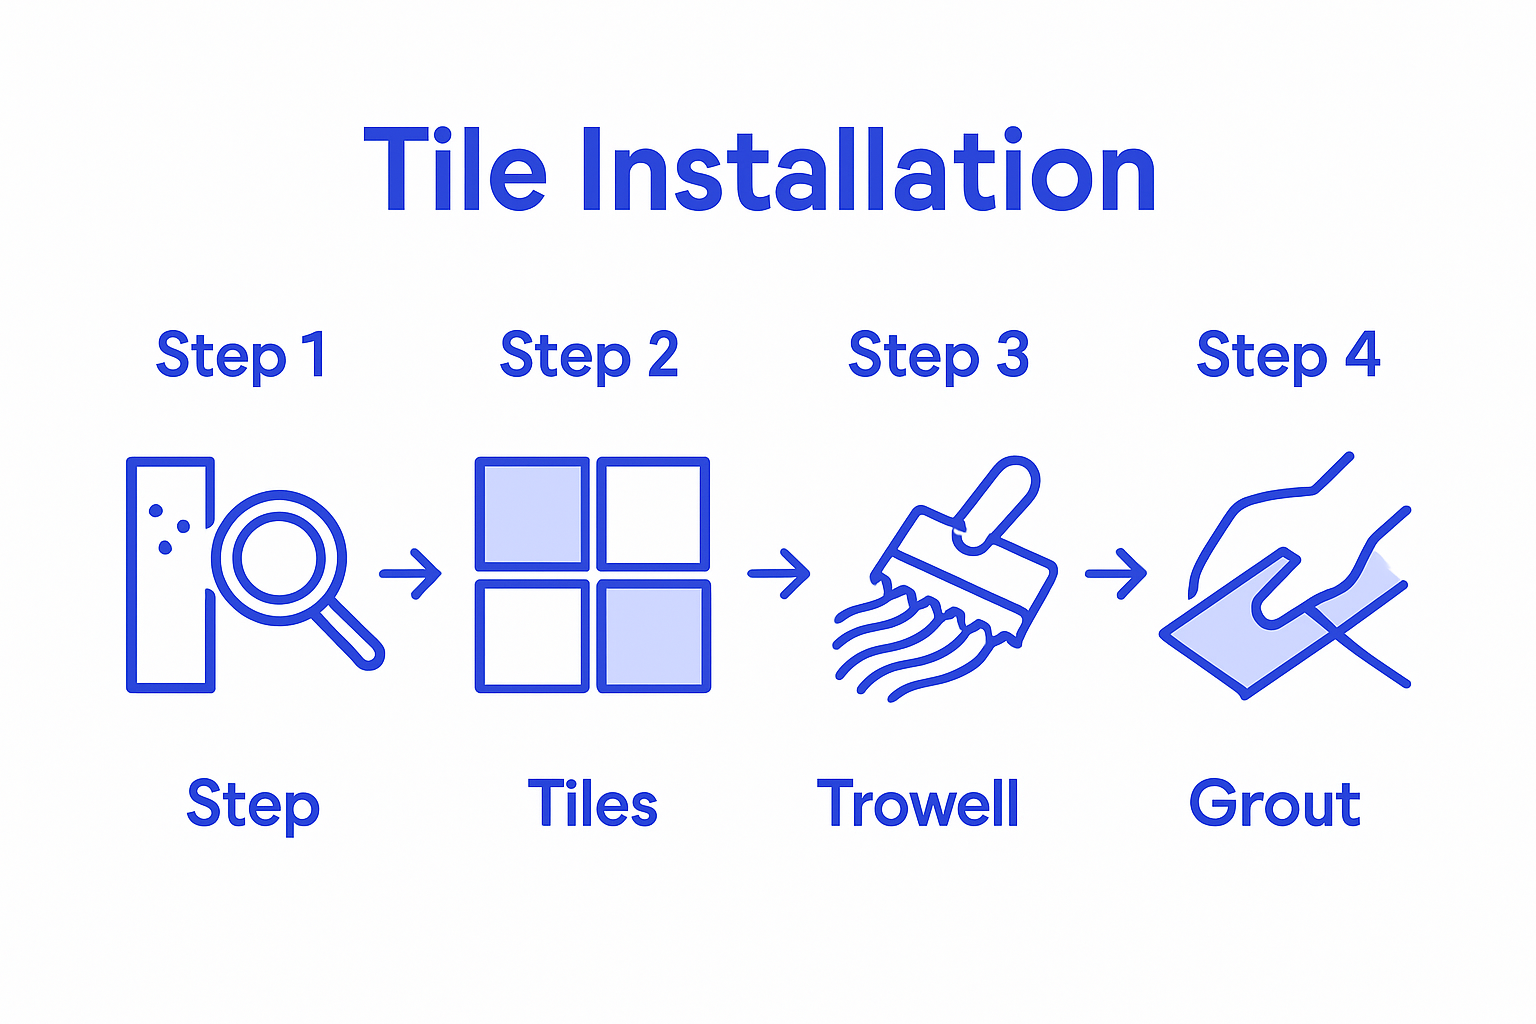
- Step 1: Assess And Prepare The Installation Area
- Step 2: Select And Arrange High-Quality Hotel Tiles
- Step 3: Apply Adhesive And Set The Tiles Evenly
- Step 4: Grout, Seal, And Clean The Tile Surface
- Step 5: Inspect And Finalize Your Hotel Backsplash
Quick Summary
| Key Point | Explanation |
|---|---|
| 1. Inspect the Installation Area | Conduct a thorough inspection for damage and proper surface conditions before starting your backsplash installation. This ensures strong adhesion and a great final look. |
| 2. Choose Quality Tiles | Select tiles that complement your hotel’s design while being durable. Test samples in different lighting to ensure they meet your aesthetic and practical needs. |
| 3. Apply Adhesive Carefully | Use appropriate adhesive with a notched trowel at a consistent angle. Work in small sections for optimal tile placement and maintain alignment with spacers. |
| 4. Grout and Seal Properly | Choose a grout color that complements your tiles. After grouting, seal the surface for moisture protection and easy cleaning to ensure long-lasting beauty. |
| 5. Perform a Final Inspection | Check for alignment, gaps, and imperfections under proper lighting. Address any issues immediately to ensure a high-quality, professional finish. |
Step 1: Assess and Prepare the Installation Area
Before diving into your hotel backsplash installation, you need a rock-solid preparation strategy that guarantees professional results. Proper area assessment is the foundation of a flawless tile project. According to the General Services Administration guidelines for tile installation, examining your substrate and installation area is absolutely critical.
Start by conducting a thorough visual and physical inspection of the wall surface. Check for any existing damage like cracks, moisture stains, uneven areas, or structural inconsistencies that could compromise your backsplash installation. Gently tap the wall surface and listen for hollow sounds indicating potential underlying issues. Use a level to confirm the wall is plumb and smooth. You want a surface that is clean, dry, structurally sound, and free from oil, wax, or any residual compounds that might prevent proper tile adhesion.
Pro tip: If you discover any wall imperfections, address them before installation. Minor cracks can be repaired with spackling compound, while more significant structural issues might require professional intervention. Ceramic Tile Education Foundation resources recommend ensuring a properly prepared substrate to guarantee a durable and long lasting tile application. Your preparation work now will directly impact the quality and longevity of your hotel backsplash.
Once you have thoroughly assessed and prepared the area, you are ready to move forward with measuring and planning your tile layout. Precision in this initial stage sets the stage for a professional installation that will look stunning and stand the test of time.
Step 2: Select and Arrange High-Quality Hotel Tiles
Selecting the perfect tiles for your hotel backsplash requires a strategic approach that balances aesthetic appeal with practical functionality. According to the U.S. Department of Housing and Urban Development guidelines, materials like granite, slate, and marble offer unique design opportunities while meeting critical durability requirements.
Start by analyzing your hotel’s overall design aesthetic and color palette. Choose tiles that complement the existing interior style and create a cohesive visual experience. Consider factors like tile size, texture, and finish that will enhance the space. Ceramic and porcelain tiles work exceptionally well in high-traffic areas, offering both beauty and resilience. Avoiding common design mistakes means carefully testing tile samples in actual lighting conditions to ensure the colors and textures look precisely as you envision.
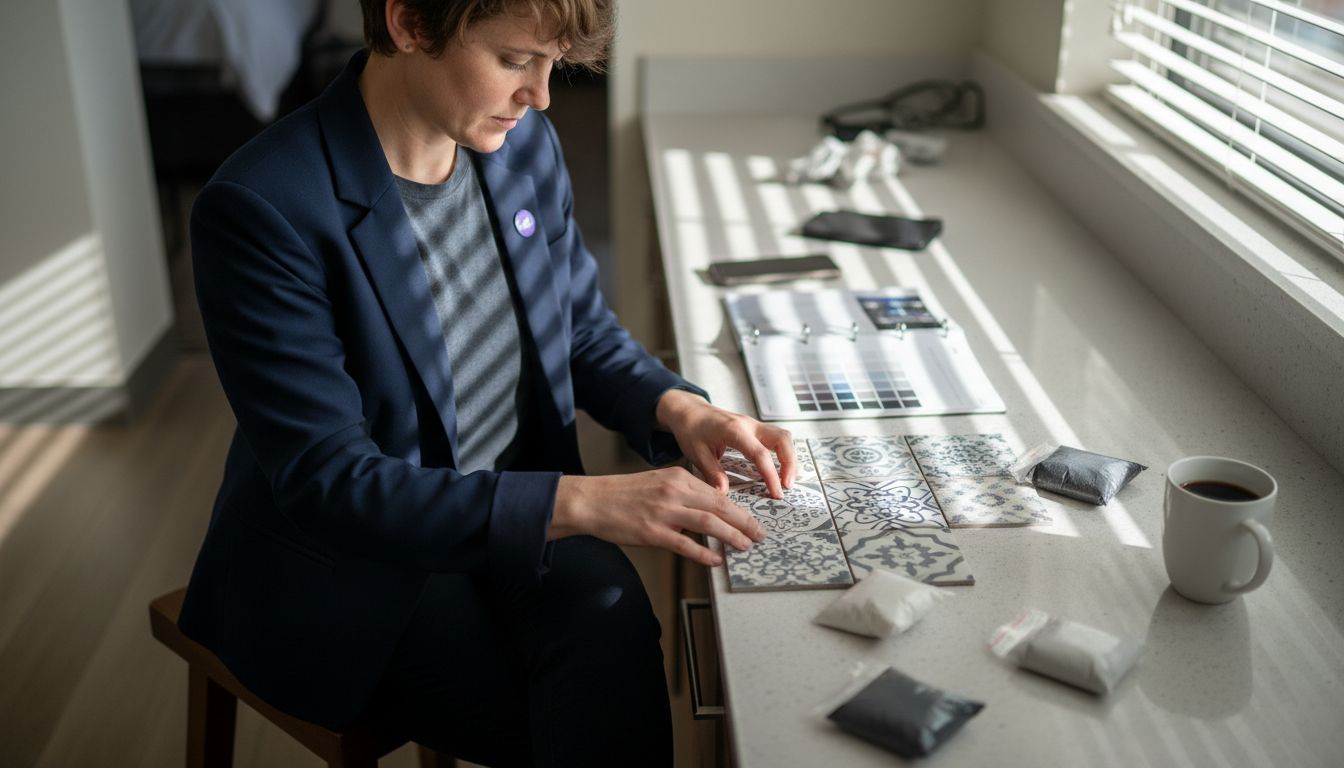
Pro tip: When arranging tiles, create visual interest through thoughtful layout patterns. Experiment with classic arrangements like herringbone, subway, or grid designs that can transform a standard backsplash into a stunning focal point. Mock up your design using tile samples before final installation to confirm the aesthetic impact and ensure seamless integration with the surrounding environment.
With your tiles selected and arrangement planned, you are now prepared to move forward to the precise measurement and cutting stage of your backsplash installation.
Step 3: Apply Adhesive and Set the Tiles Evenly
Applying adhesive and setting tiles precisely is a critical phase that determines the final quality and durability of your hotel backsplash installation. Following the General Services Administration’s meticulous guidelines for tile installation, achieving professional results requires careful technique and attention to detail.
Begin by selecting a high-quality tile adhesive appropriate for your specific tile material and wall surface. Use a notched trowel held at a consistent 45-degree angle to spread the adhesive evenly, creating uniform ridges that ensure maximum tile coverage. Work in small sections to prevent the adhesive from drying before tile placement. As you set each tile, apply gentle pressure and use tile spacers to maintain consistent gaps for grout. Carefully align tiles using a level to ensure a perfectly straight and even surface.
Pro tip: Clean excess adhesive immediately using a damp sponge to prevent hardening and maintain a professional finish. Check tile alignment frequently during installation and make adjustments while the adhesive remains workable. Take your time and work methodically to guarantee a seamless, professional result that will withstand the demands of a busy hotel environment.
With tiles carefully set in place, you are now ready to move on to the final grouting stage of your backsplash installation.
Step 4: Grout, Seal, and Clean the Tile Surface
The final stage of your hotel backsplash installation involves precision grouting, strategic sealing, and meticulous cleaning to ensure a professional finish that will withstand years of use. Following the General Services Administration’s detailed cleaning guidelines, protecting metal surfaces and using manufacturer approved cleaning solutions is crucial for maintaining your tile installation.
Begin by selecting a grout color that complements your tile design and carefully applying it using a rubber float held at a 45-degree angle. Work the grout diagonally across tile joints to ensure complete coverage and minimize air pockets. After allowing the grout to set for approximately 15 minutes, use a damp sponge to remove excess grout and create clean, crisp lines. Once the grout has fully cured, apply a high-quality tile sealer to protect against moisture and staining, ensuring your backsplash remains pristine and easy to maintain.
Pro tip: When cleaning your newly installed backsplash, avoid abrasive tools or harsh chemical cleaners that could damage the tile or grout surface. Instead, use pH-neutral cleaning solutions and soft microfiber cloths to preserve the tile’s finish and protect your investment. Regular maintenance will keep your hotel backsplash looking professional and impeccable for years to come.
With your backsplash now complete, step back and appreciate the stunning transformation you have achieved through careful planning and precise execution.
Step 5: Inspect and Finalize Your Hotel Backsplash
Following the Ceramic Tile Education Foundation’s detailed best practices, the final inspection stage is crucial for ensuring a professional and durable backsplash installation that meets the highest standards of quality and aesthetics. This comprehensive review will help you identify and address any potential issues before declaring your project complete.
Carefully examine the entire backsplash surface under good lighting, checking for alignment, grout consistency, and overall visual harmony. Look closely at tile edges, corners, and joints to confirm they are straight, evenly spaced, and free from chips or imperfections. Run your hands gently across the surface to detect any uneven tiles or slight protrusions. Pay special attention to areas around electrical outlets, corners, and edges where precise cutting and placement are most challenging.
Pro tip: Take high-resolution photographs of the completed backsplash from multiple angles. These images can serve as a baseline for future maintenance and help you document the installation quality. If you notice any minor imperfections during your final inspection, address them immediately while materials are still fresh and adjustable. Small corrections now can prevent more significant issues down the line.
With a thorough inspection complete, your hotel backsplash installation is now ready to provide years of beautiful, functional service.
Elevate Your Hotel Backsplash with Expert Tile Selection and Installation
Installing a flawless hotel backsplash requires precise preparation, careful tile selection, and expert application to ensure durability and style that stand up to busy commercial environments. Common challenges like achieving perfect tile alignment, selecting the right materials that blend beauty with resilience, and applying adhesives and grout with professional technique all demand quality tile products designed for both aesthetics and performance. At BELK Tile, we understand these challenges and provide a comprehensive collection of high-quality tiles including ceramic, porcelain, natural stone, and specialty designs meticulously curated to meet your project goals.
Make your backsplash installation seamless and stunning by exploring our extensive tile collections that offer unmatched style versatility and long-lasting durability. Whether you are a contractor, designer, or hotel property owner, BELK Tile has you covered with detailed product information and easy online purchasing options to simplify your decision-making process. Don’t let installation pitfalls hold you back. Visit BELK Tile today to browse tiles perfect for kitchen backsplashes and commercial projects. Take the first step toward a backsplash that impresses guests and lasts for years by choosing tiles crafted for excellence at BELK Tile.
Discover tile inspiration, find exactly what you need, and start transforming your hotel kitchen backsplash now.
Frequently Asked Questions
How do I assess the wall before installing a hotel backsplash?
To assess the wall, inspect it for cracks, moisture stains, and uneven areas that could affect tile adhesion. Clean the surface thoroughly and ensure it is smooth and dry before starting the installation.
What type of tiles should I select for a hotel backsplash?
Select tiles that balance aesthetic appeal with durability, such as ceramic or porcelain. Consider the design of your hotel and choose colors and textures that complement the existing style.
How do I apply adhesive when installing my backsplash tiles?
Apply adhesive using a notched trowel held at a consistent angle to create uniform ridges. Work in small sections and use tile spacers to maintain even gaps between tiles throughout the installation process.
What should I do after grouting my hotel backsplash?
After grouting, clean excess grout with a damp sponge and allow it to cure fully. Then, apply a high-quality sealer to protect the grout from moisture and stains, ensuring easy maintenance in the future.
How can I ensure my backsplash installation is aligned correctly?
Check alignment frequently during installation using a level and adjust tiles as needed while the adhesive remains workable. Taking your time and examining edges and joints will help achieve a straight, professional finish.
What final steps should I take to inspect my completed hotel backsplash?
Carefully examine the entire backsplash under good lighting for any imperfections or misalignments. Make necessary adjustments or corrections immediately while the grout and adhesive are still fresh.
Recommended


