How to Install Peel and Stick Tile Like a Pro
Posted by Mike Belk on Sep 12, 2025

Peel and stick tiles promise a fresh new look with minimal hassle, making them a popular DIY choice for floors and backsplashes. Most people assume that you can just peel, stick, and call it a day. But improper surface preparation is one of the top reasons tiles end up uneven or start lifting within weeks, turning that weekend project into a headache. The real secret to getting a flawless, lasting result is all in the hidden steps before the first tile ever hits the floor.
Table of Contents
- Step 1: Prepare Your Workspace And Gather Materials
- Step 2: Clean And Level Your Floor Surface
- Step 3: Measure And Plan Your Tile Layout
- Step 4: Cut Tiles To Fit And Apply Adhesive
- Step 5: Press Tiles Down And Ensure Proper Alignment
- Step 6: Finish Edges And Perform Quality Checks
Quick Summary
| Key Point | Explanation |
|---|---|
| 1. Thoroughly prepare the workspace | Clean, dry, and smooth surfaces are essential for proper tile adhesion and a professional finish. |
| 2. Repair surface imperfections | Fill cracks and level dips before installation to prevent future issues with tile alignment. |
| 3. Measure and plan layout carefully | Accurate measurements and a strategic layout minimize waste and ensure a pleasing visual aesthetic. |
| 4. Cut tiles with precision | Use a sharp knife and straightedge for clean, accurate cuts to avoid damage and ensure a seamless fit. |
| 5. Perform quality checks post-installation | Inspect for misalignment and secure adhesion to ensure a durable and visually appealing result. |
Step 1: Prepare Your Workspace and Gather Materials
Successful peel and stick tile installation begins with meticulous workspace preparation and strategic material gathering. Before diving into the project, understanding the foundational steps will significantly increase your chances of achieving a professional looking result. Preparation is key to ensuring a smooth, long lasting tile application.
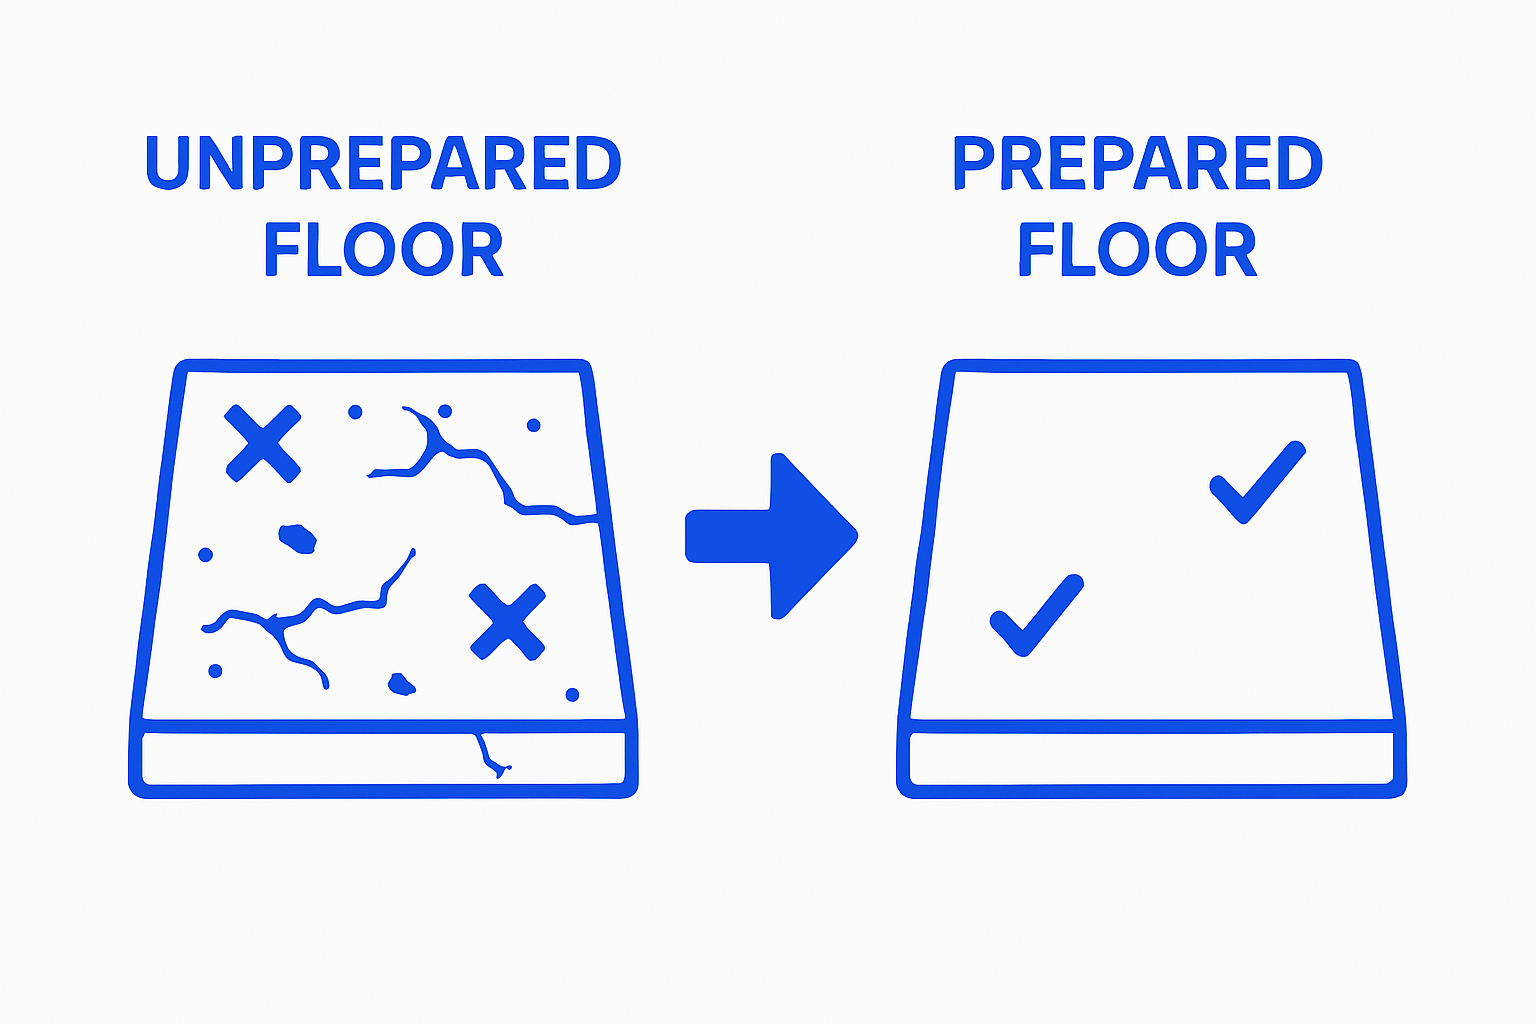
Start by thoroughly examining your existing floor surface. The substrate must be completely clean, completely dry, and absolutely smooth. Remove any existing flooring debris, sweep or vacuum the area multiple times, and then wipe the surface with a degreasing cleaner to eliminate any residual oils or contaminants. If you notice any significant imperfections like bumps, cracks, or uneven areas, you will need to address these before installation. Filling small gaps and sanding down minor irregularities is crucial for creating a perfect foundation.
For your materials and tools, you will want to collect everything before beginning. Here are the essential items you should have on hand:
- Measuring tape
- Sharp utility knife
- Straight edge or metal ruler
- Clean cloth or microfiber towel
- Degreasing cleaner
- Floor roller or heavy rolling pin
- Protective gloves
Temperature matters significantly in peel and stick tile installation. The ideal room temperature should be between 65 and 85 degrees Fahrenheit, and the tiles themselves should acclimate to the room temperature for at least 24 hours before installation. This prevents potential warping or improper adhesion. Learn more about our tile installation best practices to ensure optimal results.
Before proceeding, do a final surface inspection. Run your hand across the floor to feel for any remaining rough spots. The surface should feel completely smooth and clean. Any remaining debris or unevenness can compromise the tile’s adhesion and overall appearance.
This checklist table provides key verification steps to ensure your floor is perfectly prepared before installing peel and stick tiles.
| Preparation Step | What to Check For |
|---|---|
| Surface Cleanliness | No dust, grease, or debris present |
| Surface Dryness | Floor feels completely dry to the touch |
| Smoothness and Levelness | No bumps, dips, or rough areas; level with straight edge |
| Repaired Imperfections | Cracks filled, dips leveled, rough spots sanded |
| Temperature Acclimation | Room and tiles at 65-85°F for at least 24 hours |
| Final Surface Inspection | Surface feels smooth and uniform under your hand |
| By investing time in thorough preparation, you are setting the stage for a successful and professional looking tile installation project. |
Below is a summary table of the essential tools and materials you need for a successful peel and stick tile installation, including their specific purposes.
| Tool/Material | Purpose |
|---|---|
| Measuring tape | Accurately measure room and calculate tile quantity |
| Sharp utility knife | Cut tiles cleanly and precisely |
| Straight edge/ruler | Guide straight cuts and layouts |
| Clean cloth/towel | Wipe surfaces before tile application |
| Degreasing cleaner | Remove grease, dirt, and contaminants from the floor |
| Floor roller/rolling pin | Apply pressure for secure tile adhesion |
| Protective gloves | Protect hands during cleaning and cutting |
Step 2: Clean and Level Your Floor Surface
Cleaning and leveling your floor surface is a critical step that directly impacts the success of your peel and stick tile installation. This process ensures a smooth, stable foundation that allows tiles to adhere perfectly and create a professional looking finish. Improper surface preparation can lead to uneven tiles, premature lifting, and an unsightly result.
Begin by conducting a thorough cleaning process that goes beyond simple sweeping. Use a strong degreasing cleaner specifically designed for floor surfaces, applying it with a clean microfiber cloth or mop. Work systematically across the entire floor, paying extra attention to corners and edges where dirt and grime tend to accumulate. After cleaning, allow the surface to dry completely for at least 30 minutes, ensuring no moisture remains that could interfere with tile adhesion.
Addressing surface imperfections requires careful attention. Small cracks, dips, or uneven areas must be repaired using a floor leveling compound. Apply the compound with a trowel, working in smooth, consistent strokes to create an absolutely flat surface. Once applied, allow the leveling compound to dry completely according to manufacturer instructions. After drying, sand down any remaining rough spots to create a glass smooth surface that will support your new tiles perfectly. Check out our comprehensive guide on tile maintenance for additional insights into floor preparation.
Verification is crucial before moving forward. Run your hand across the entire surface to feel for any remaining irregularities. Use a long level or straight edge to confirm the floor is completely flat. Any bumps larger than a credit card thickness should be addressed. The floor should feel smooth, clean, and uniform. By investing time in this critical preparation step, you are setting the foundation for a flawless peel and stick tile installation that will look professional and last for years to come.
Step 3: Measure and Plan Your Tile Layout
Measuring and planning your tile layout is the most critical phase that determines the overall aesthetic and professional appearance of your peel and stick tile installation. Precision at this stage prevents costly mistakes and ensures a visually pleasing result. Before cutting a single tile, you will need to develop a strategic approach that minimizes waste and maximizes visual symmetry.
Start by carefully measuring the entire floor area using a reliable measuring tape. Measure the length and width of the room, then calculate the total square footage. Always add an extra 10% to your calculated measurement to account for potential cutting errors, unusual room shapes, or unexpected challenges. When measuring, pay close attention to unique architectural features like doorways, cabinets, or irregular room corners that might require custom tile cutting. Sketch a rough floor plan on graph paper, marking precise measurements and noting any obstacles that will require special tile placement considerations.
To create a balanced layout, find the room’s centerline by measuring and marking the midpoint of each wall. This central point becomes your starting reference for tile placement. Dry lay a few tiles without adhesive to test your layout and verify how tiles will align. This technique helps you anticipate where you might need to cut tiles and ensures a symmetrical appearance. Explore our kitchen tile design guide for additional insights into creating visually appealing tile arrangements.
Before proceeding, conduct a final layout verification. Your tiles should be positioned so that cut tiles along walls are at least half a tile wide. Avoid having extremely narrow tile cuts on visible edges, as these can look unprofessional. Use chalk lines or laser levels to create precise guidance lines that will keep your tiles perfectly aligned during installation. By investing time in meticulous planning, you transform a potentially challenging project into a manageable and rewarding home improvement task.
Step 4: Cut Tiles to Fit and Apply Adhesive
Cutting tiles and applying adhesive requires precision, patience, and the right techniques to achieve a professional looking installation. This step transforms your measured layout into a real floor transformation, demanding careful attention to detail and methodical execution. The goal is to create seamless tile placement with minimal waste and maximum visual appeal.
Prepare your cutting station with a sharp utility knife, metal straightedge, and a clean cutting surface. When cutting peel and stick tiles, always measure twice and cut once. Use your straightedge as a guide to ensure perfectly straight cuts. Score the tile gently first, then apply consistent pressure to create a clean cut. For complex cuts around obstacles like pipes or irregular room features, create a paper template first to ensure accuracy.
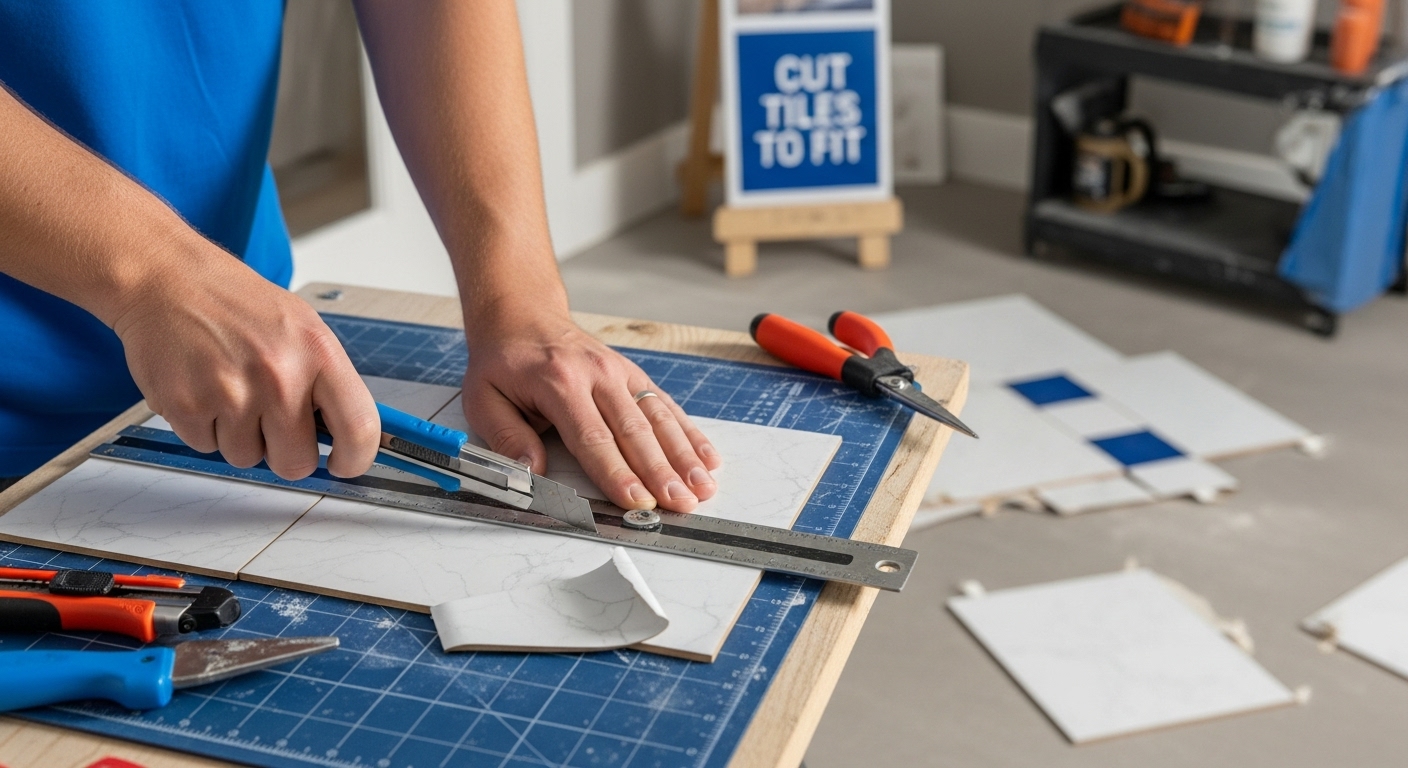 Specialty tile cutting tools can make intricate cuts easier, but a sharp utility knife and steady hand work well for most peel and stick tile installations.
Applying adhesive requires a systematic approach. Start at the center point of your room that you identified during the layout planning. Peel and stick tiles have pre applied adhesive, but you want to ensure maximum contact and longevity. Remove the backing paper slowly and carefully, pressing each tile firmly into place. Use a floor roller or a clean, heavy book to apply consistent pressure across each tile, eliminating air bubbles and ensuring complete adhesion. Work in small sections, moving methodically from your center point outward. Check out our professional tile installation guide for additional insights into achieving a flawless finish.
Verification is crucial. After installation, walk across the entire floor, applying firm pressure to confirm all tiles are securely attached. Look for any raised edges or gaps between tiles. Small imperfections can be corrected by gently lifting and repositioning tiles. By taking your time and working carefully, you are creating a durable, professional looking floor that will enhance your space for years to come.
Step 5: Press Tiles Down and Ensure Proper Alignment
Pressing tiles down and ensuring proper alignment is the make or break moment of your peel and stick tile installation. This critical step determines the final visual quality and long term durability of your new floor. Your goal is to create a seamless, professional looking surface that appears effortlessly perfect while preventing future lifting or misalignment.
Begin by using a floor roller or a clean, heavy rolling pin to apply consistent pressure across each tile. Start from the center of the tile and roll outward in multiple directions, using firm and steady pressure. The key is to eliminate any air bubbles and ensure maximum adhesive contact. For areas difficult to reach with a roller, use a clean, heavy book or a flat wooden block wrapped in a soft cloth. Apply pressure systematically, working your way across the entire floor surface. Pay extra attention to tile edges and corners, which are most prone to lifting or improper adhesion.
Alignment requires meticulous attention to detail. As you place each tile, use your previously established center lines and layout guides to maintain consistent spacing and orientation. Small variations can quickly become noticeable, especially in larger rooms. Use a laser level or chalk lines to verify straightness and alignment throughout the installation process. If you notice any tiles slightly out of position, you can gently lift and reposition them within the first few minutes after placement. Explore our professional tile installation tips for additional insights into achieving a flawless finish.
Verification is crucial. Once installation is complete, walk across the entire floor, applying firm pressure to confirm all tiles are securely attached. Look for any raised edges, gaps between tiles, or areas that seem less firmly adhered. A final thorough inspection from multiple angles and lighting conditions will help you identify and correct any minor imperfections. By taking your time and working carefully, you are creating a durable, professional looking floor that will enhance your space for years to come.
Step 6: Finish Edges and Perform Quality Checks
Finishing edges and performing quality checks represent the final transformation of your peel and stick tile installation from a project to a professional looking floor. This critical step ensures your hard work results in a polished, seamless surface that looks like it was installed by a professional. The goal is to create clean edges, eliminate any imperfections, and verify the overall quality of your installation.
Start by addressing the room’s perimeter and challenging areas like corners, doorways, and unusual architectural features. Use a sharp utility knife and a metal straightedge to trim tiles precisely along walls and around obstacles. Make multiple light passes with the knife instead of trying to cut through the tile in one aggressive stroke, which can cause jagged edges or tile damage. For tight spaces like door frames or irregular corners, create paper templates first to ensure accurate cutting. Professional installers recommend leaving a small 1/8 inch gap between tiles and walls, which can be later covered with baseboards or trim, allowing for natural expansion and contraction.
Quality checks require a systematic and thorough approach. Examine the floor from multiple angles and lighting conditions. Kneel down and look across the surface to spot any tiles that are not perfectly flat or have slight variations in alignment. Press firmly along all tile edges to confirm complete adhesion. Learn more about professional tile installation techniques for additional insights into achieving a flawless finish. Check for air bubbles by gently tapping tiles with a rubber mallet or rolling a floor roller across the entire surface. Any tiles that seem loose or incompletely adhered can be carefully lifted and repositioned or replaced.
Final verification involves walking across the entire floor, paying attention to how tiles feel underfoot. The surface should feel uniformly smooth with no noticeable lips or gaps between tiles. Take photographs in different lighting to review your work critically. By investing time in these finishing touches, you transform a good tile installation into an exceptional one that will look beautiful and perform well for years to come.
Achieve Professional Results with Quality Tiles from BELK Tile
Are you tackling peel and stick tile installation but worried about hidden bumps, tricky layouts, or the frustration of poor adhesion? This guide shows how crucial careful preparation and the right materials are for a flawless finish. From cleaning and leveling your surface to executing precise cuts and perfect alignment, every detail matters. If you want your project to look truly professional and last for years, your choice of tiles is just as important as your technique.
Stop settling for generic home store options that compromise on style or durability. Explore the full range of high-quality peel and stick and specialty tiles at BELK Tile, where you can filter by color, material, and application to find the perfect match for your space. Need step-by-step help or want to visualize options before you buy? Browse our inspirational tile installation guides and discover practical maintenance tips that set you up for success. Start your renovation with confidence—shop now at BELK Tile’s main site and turn your project inspiration into reality today.
Frequently Asked Questions
What preparation is needed before installing peel and stick tile?
Successful installation begins with a thoroughly clean, dry, and smooth floor surface. Remove debris, clean with a degreasing cleaner, and address any imperfections before starting the installation.
How do I ensure a professional-looking tile layout?
Measure the room accurately to calculate total square footage, add 10% for waste, and find the centerline for starting your layout. Dry lay tiles to test placement and ensure symmetry before adhering them.
What tools are necessary for cutting peel and stick tiles?
Essential tools include a sharp utility knife, a metal straightedge, and a clean cutting surface. For complex cuts, consider using specialty tile cutting tools or creating paper templates.
How can I prevent air bubbles during installation?
To prevent air bubbles, apply consistent pressure while adhering tiles, using a floor roller or heavy book to ensure proper adhesion. Work methodically from the center outward, and check for air bubbles after installation for any necessary adjustments.
Recommended


